NASA 3D-Printed Rocket Engine Is Ready
July 31, 2013

3D printing has been used to manufacture almost everything you can imagine, from action figures to guitars. It has even been used to create parts for robots and automobiles. It looks as though a different form of 3D printing will be used to send rockets into space.
NASA recently teamed up with aerospace/defense company Aerojet Rocketdyne to develop a rocket engine constructed through an additive printing process. The additive process (a form of 3D printing) can be accomplished through several methods. Selective laser sintering fuses small particles of metal into a desired shape. Fused deposition modeling melts metal through the nozzle, creating shapes one layer at a time. Stereolithography uses a vat filled with curable resin that "hardens" one layer at a time.
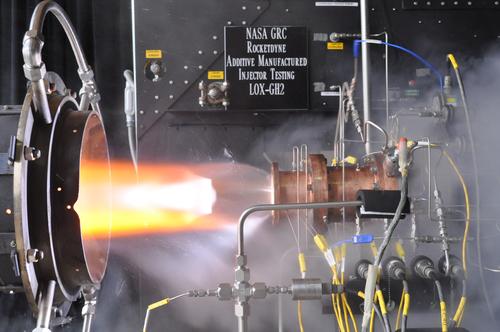
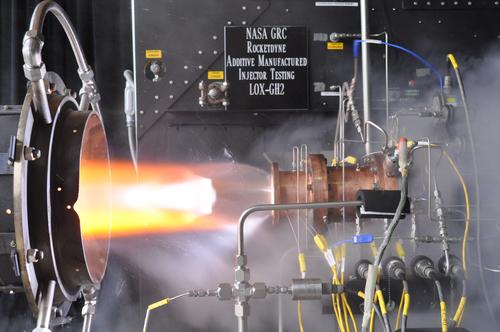
Another form of additive printing is known as selective laser melting (SLM), which is the method both companies used to create their functioning prototype rocket engine. SLM uses a high-powered laser to melt the metal into a particular shape determined by a CAD file. Specifically, the collaborative parties used the SLM process to create a liquid-oxygen/gaseous hydrogen rocket injector assembly, which is a critical part of the rocket engine, since it is the part responsible for controlling the combustion process.

Traditionally, these parts are tested in controlled settings to determine their performance and quality before they are assembled into the engine itself. These are known as SLS (Space Launch System) acoustic tests, where engineers listen for anything that may be off during a test firing. The injectors for these tests are traditionally smaller than their full-scale mockups. They usually take around six months to fabricate using four parts with a total of five welds costing upwards of $10,000 US each.
To put that into perspective, NASA engineers fabricated the same test injector in one piece using the SLM method with Iconel stainless-steel (nickel-iron-chromium alloy) powder along with their industrial-grade printer. The engineers fabricated the part, and then used a minimal amount of machining to clean it up. They used a series of computer scans to search for defects.
The whole process of manufacturing the injector took only three weeks to accomplish, at a cost of only $5,000, which is a significant reduction over the time and cost of its parent part. Actually, it only took 40 hours to fabricate the injector itself. The rest of the time was spent polishing and inspecting it before it headed off to the test bed! A total of two injectors were made and were subjected to 11 main-stage hot-fire tests for a total of 45 seconds worth of burn time at up to 6,000°F. Not only did the injectors successfully handle the test fires, they showed little to no damage after being subjected to extreme heat and pressure.
Related posts:
About the Author(s)
You May Also Like


