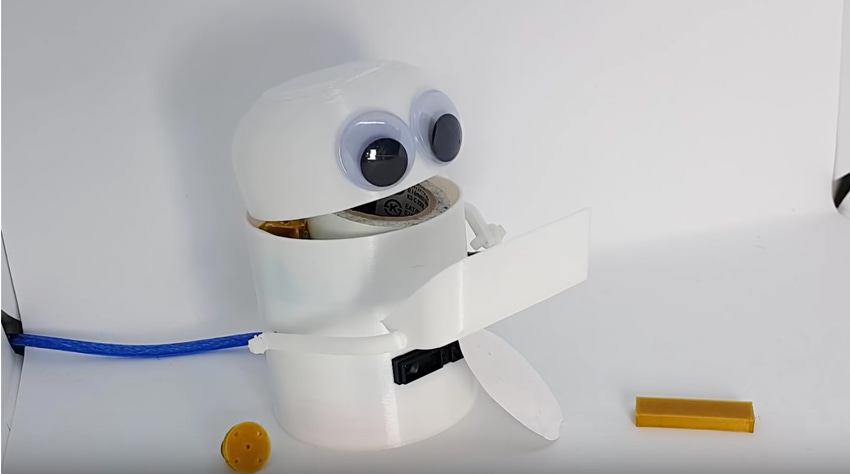
How to Make a "Hungry" Robot
Sometimes the best robots are more emotional and less functional. Gadget Freak Eunchan Park shows you how to build a coin-eating robot using Arduino, a 3D printer, and a touch of open source.
August 9, 2018

If you're old enough to remember Radio Shack (and shame on you if you're not!), you probably remember those old coin-eating robot piggybanks. You'd put a coin in its hand and it would “eat” it.
Sometimes, the best robots are less functional and more emotional. Asked why he made this project, creator Eunchan Park simply stated, “This is fun, makes me smile, and feels good.”
Here's how to build your own Hungry Robot using Arduino along with some open-source code and freely available 3D printing model files:
Parts List
BUILD INSTRUCTIONS
Arduino Setup:
First, we'll need to upload the source code to the Arduino board.
|
|
1.) Install Arduino IDE.
2.) Download the source code.
3.) Connect your Arduino to your PC via USB.
4.) Select the board, processor, and com port – Arduino Nano and ATmega328P (Old Bootloader).
5.) Find and select the emerging com port and click “Upload.”
3D Printing Parts:
1.) Download the 3D modeling files from Thingiverse.*
*For each part, the brim setting needs to be at least 1mm.
Circuit Assembly:
 1.) All parts are connected using a female-to-female Dupont cable. You'll need to cut and re-wire the cable manually to save space inside the robot. To do this, strip the cables and then twist the wires together and tape them.
2.) The servo motor uses three pins. Vcc and GND is essential and a PWM pin must also be allocated with the servo motor. In this project, pin 12 is used.
3.) The infrared sensor also uses three wires. The Arduino requires an analog input to detect objects at a distance. In this project, A7 pin is allocated.
Hardware Assembly:
1.) To assemble the arms, use a screwdriver to connect the black horn from the servo motor to the the hand (printed with the hand.stl file).
2.) Next, attach the guide piece (guide.stl) behind the servo motor and place the servo motor inside the body (body.stl). Use a screwdriver to fix it in place.

3.) Place the infrared sensor into the body so that it is facing out of the long slot. Then, insert in the inner body “basket” (inner_body.stl).

4.) Affix the hand to the body by threading one cable tie from the inside out, then using another cable tie to hold everything in place.

5.) Attach the head (head.stl) to the body using the same cable tie method. Lock the head in place to the body at the joint and thread a cable tie through.
6.) Now, connect the head and body using the link (link.stl). This is the most important part of the robot's body. Again, you'll want to use the cable tie method.

7.) Connect all of the wires to the Arduino board. Check the color, location, and pin numbers. The diagram below provides a helpful guide:

8.) Place the Arduino inside of the body and plug a USB cable into the Arduino through the hole at the bottom of the body.
9.) Once the Arduino and USB cable are in place, the bottom (bottom.stl) should snap right in place.

10.) Glue the toy eyeballs to the robot and paint/decorate it however you want. Your Hungry Robot is ready to eat whatever you put in its hands!

[All images courtesy Eunchan Park]
About the Author(s)
You May Also Like


