Meet the Arduino Uno R4 Minima and WiFi, Part 1
32-bit data bus, 48-MHz clock, more memory, and WiFi connectivity—what’s not to love?
July 12, 2023
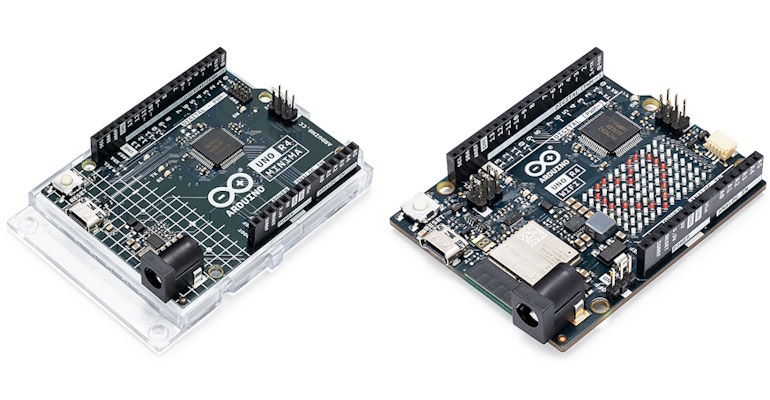
The guys and gals at Arduino have just released the latest and greatest version of the Arduino Uno. The previous generation was called the R3, so it’s no great surprise that the new generation flaunts R4 as part of its moniker. In fact, there are two flavors of this bodacious beauty: the Uno R4 Minima and the Uno R4 WiFi.
If you aren’t already drooling with desire and cheering with delight, you will be shortly when I explain all the cool things these boards have to offer. And, just to add a big dollop of allegorical whipped cream on top of the metaphorical cake, for those who love the existing R3 just the way it is, I’m delighted to report that the chaps and chapesses at Arduino have no plans to discontinue the little ragamuffin for which they foresee strong continued demand.
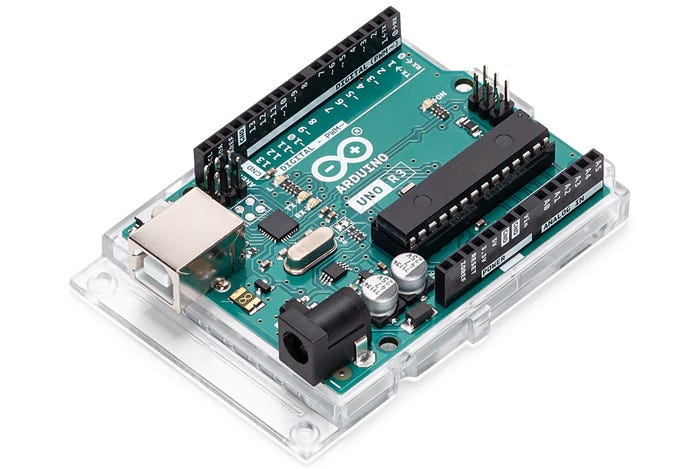
Now, before we proceed to discuss the new R4 models in more depth, let’s first remind ourselves what the Uno R3 brought (and continues to bring) to the party. Let’s start with the fact that it comes equipped with a USB-B connector with which it can communicate with a host computer. The R3 can be powered by its USB connector or via an external supply, in which case a 7 to 12 V supply is recommended (a 6 to 20 V supply is the limit). Also of interest is the fact that the signaling voltage levels on the R3’s digital input/output (I/O) pins are 0 to 5 V.
The R3 is powered by an ATmega328P microcontroller unit (MCU). This little scamp has an 8-bit data bus, a 16 MHz clock, 2 KB of SRAM, 32 KB of Flash memory, and 1 KB of EEPROM (which can be used to store data under program control).
The R3’s MCU doesn’t have a hardware floating-point unit. This isn’t a problem for most users who happily work using fixed-point values in the form of integers. However, any users working with values like 3.14159 (yes, of course this is Pi) are going to see the R3 slow to a crawl. This is because each floating-point value is stored as 32 bits (4 bytes) of information, and each floating-point operation must be implemented using a bunch of 8-bit integer operations. (How big is a “bunch”? I don’t have a clue, but I’m quietly confident it’s more integer operations than you might expect.)
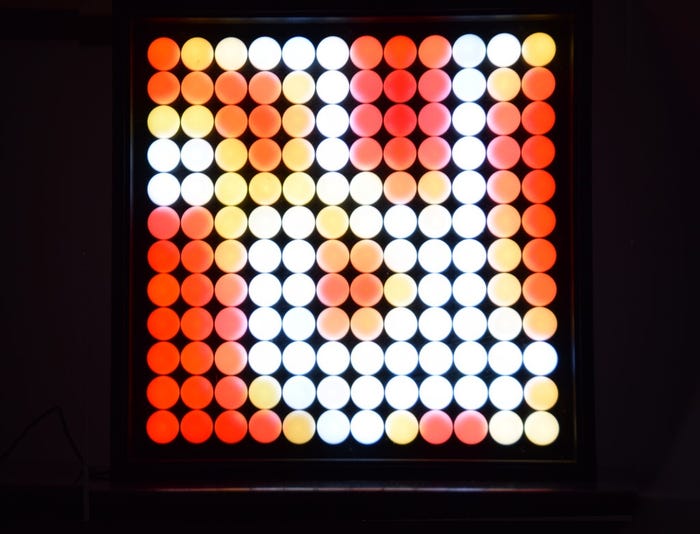
Now, I have to admit that I have a soft spot for the Uno R3 because I grew up in a world where 8-bit microprocessors and microcontrollers were considered to be as cool as cucumbers. I’ve got R3s scattered throughout my home and office, and I’ve used them on countless projects, such as my 12x12 ping pong ball array, for example (see Noise is My New Best Friend). I’m also using the Uno R3 as the basis for my soon-to-be-legendary therebone project—see Theremin? Bleh! Therebone? Yeah!
I come from the days when an 8-bit single-board computer (SBC) came equipped with only 2 KB of ROM and 1 KB of RAM, which meant you had to be miserly with every byte of memory and parsimonious with every cycle of the clock. I remember when computer magazines held competitions to see who could perform a specified task in assembly code using the smallest number of clock cycles or the fewest number of bytes. As a result, I quite enjoy working within the constraints imposed by the R3.
On the other hand … it has to be acknowledged that certain projects could benefit from having a bit more “oomph” (stop me if I’m getting too technical) at their disposal. There are, of course, many other types of Arduino development boards around flaunting wider data busses, more memory, faster clocks, and higher-performance processors. However, there are downsides to these offerings, the biggest of which is that they have a different physical footprint to the Uno, coupled with the fact that many of them use signaling voltages of 0 to 3.3 V on their digital input/output (I/O) pins.
I don’t think it’s too much of a stretch to say that the Uno R3’s footprint—particularly the layout of its header pins—has grown to be somewhat iconic. So much so, in fact, that it’s possible to see headers following this footprint on many other boards. The reason for this is that, in the years since the first Uno was released in 2010, a humongous number of add-on boards called “shields” have been developed with header pins that match the Uno footprint. These shields include sensors, displays, motor controllers, relays, Wi-FI, and myriad other things.
What all this means is that many of the users who wish to upgrade their Uno R3s to meatier models require these new boards to (a) proffer the same header footprint and (b) support the same 0 to 5 V signaling voltages on the digital I/O pins.
And so we come to the new Uno R4s, which do indeed offer the same header footprints and the same digital I/O voltages as the R3. Let’s start with the Uno R4 Minima. The first obvious point to note is that the old USB-B connector has been replaced with a new USB-C counterpart. “Thank goodness for that,” is all I can say. What’s less obvious is that the maximum power supply voltage has been increased to 24 V with an improved thermal design. Also, in addition to the R3’s UART, I2C, and SPI interfaces, the R4 also boasts a CAN bus interface, which can be jolly useful for some users (these users were obliged to use a CAN shield with the R3).
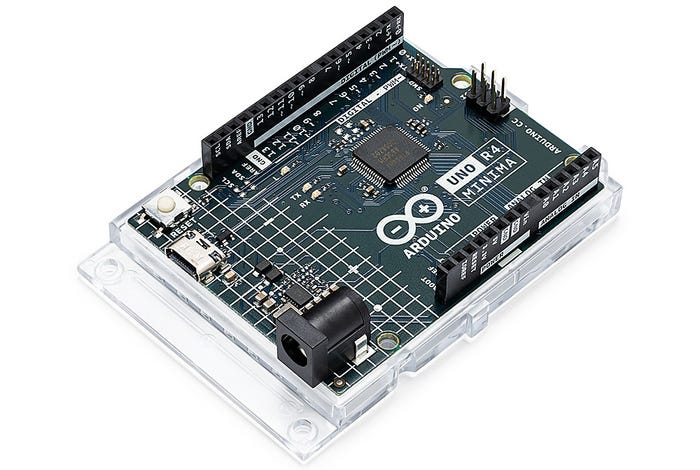
But the real difference that will have users squealing in delight is that the R4’s microcontroller is a RA4M1 from Renesas. This little rascal is based on a 32-bit Arm Cortex-M4F core (the ‘F’ means it includes a hardware floating-point unit). This is, of course, 4X the width of the R3’s 8-bit data bus. The R4’s clock runs at 48 MHz (3X the R3), it’s equipped with 32 KB of SRAM (16X the R3), and it boasts 256 KB of Flash memory (8X the R3). The R4 doesn’t have any EEPROM, but it’s possible to reserve some of the Flash memory to act as a pseudo-EEPROM.
Last, but certainly not least, we come to the Uno R4 WiFi. In addition to the same RA4M1 microcontroller as the R4 Minima, the R4 WiFi also boasts an Espressif ESP32-S3 module for WiFi and Bluetooth Low Energy connectivity. There’s also a super-bright 12x8 red LED matrix, which is ideal for creative projects using animations or for plotting sensor data without the need for additional hardware.
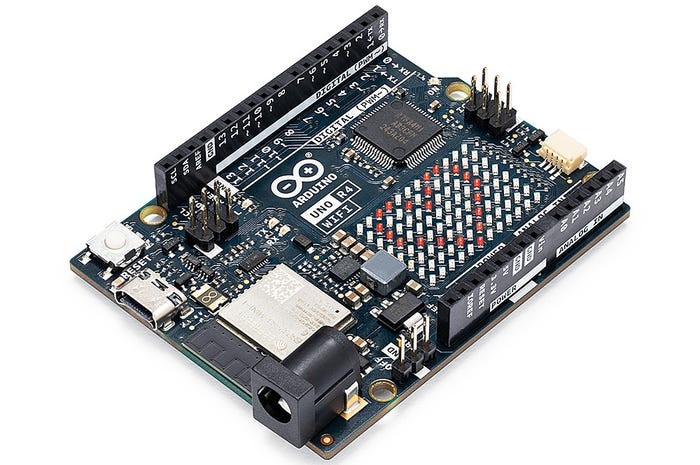
But wait, there’s more, because there’s also a 4-pin Qwiic connector that supports a large ecosystem of interface development boards with sensors, displays, relays, and more.
One thing that’s been bugging me is hearing people say that the new R4s offer 3X the performance of their R3 forebears, but this is based only on the fact that the R4’s clock runs at 3X the frequency of the R3. There are many other factors in play here, and I wouldn’t be surprised to see significantly larger performance boosts for certain usage scenarios.
Happily, I have a trio, triad, or troika of Arduino Uno R3, Uno R4 Minima, and Uno R4 WiFi boards sitting on my desk as we speak. I intend to put these boards through their paces and report back further with some nitty-gritty performance comparisons in my next column. Until then, as always, I look forward to your sagacious comments and insightful questions.
Continue reading on here for Part 2.
About the Author(s)
You May Also Like


.jpg?width=300&auto=webp&quality=80&disable=upscale)
