Closing the Skills Gap With Sheet Metal Fabrication
Smart machines are easing metal fabrication, but it’s still important to follow best practices in design.

New technologies are blurring the lines between CAD/CAM software and equipment to overcome training gaps, enabling more manufacturers to enter sheet metal fabrication. However, even with this technology, following best practices in part design is essential to ensuring that components function as intended. For instance, ensuring there’s enough space around features and providing manufacturers with a 3D file of your part will help ensure your parts are robust and created to your specifications.
Changing Metal Fabrication Landscape
Newer CAD-embedded presses, punches, and sheet metal brakes are replacing increasingly difficult-to-access training to enable companies to start fabricating faster. These machines use a 3D CAD design or digital twin to extrapolate a flat pattern, but that’s not all. They also give their operators feedback, training, and step-by-step instructions on how to fabricate a sheet metal part, including which tools are needed and how to place workpieces in the machine. They can even prevent a user from making mistakes in fabrication.
Machinery like this is more crucial than ever to overcome accessibility barriers to one of the least expensive manufacturing methods. Fabricating is often cheaper than milling, and it scales well in volume production. It also is effective for large parts, and it provides parts of all sizes with a high strength-to-weight ratio. However, specialized fabrication knowledge has traditionally been limited to CAD designers and machine operators, requiring years of training and experience. Now, fabrication apprenticeship and training programs are vanishing, making learning these skills through training even more difficult. This is where these machines come in; they help to augment knowledge so those with less training can also enter the field.
For companies that can afford these machines (which can cost five times the price of a traditional one) the investment allows them to catch up on traditionally tribalized knowledge and quickly start production. For one company in our manufacturing network, this machinery enabled them to expand their range of services beyond laser cutting and start offering bending and other sheet metal fabrication services using online tutorials and the machine’s guidance. The equipment and digital tools caught them up on the skills they needed immediately. While suppliers now have these machines to help them, however, there are still certain design best practices to keep in mind to ensure the final parts come out exactly to your specifications. What does a manufacturer need from a designer to make their part successfully? What are the best design tips for sheet metal? Read on and find out.
Your Flat Pattern (Alone) Is Wrong
Flat patterns will often assume a generic bend radius and K factor, which aren’t always accurate. Bend radius is always measured from the inside of the bend. K factor is defined as the ratio of the material’s neutral axis to its thickness. The neutral axis represents the transition area between the two effects that will occur during bending—compression and expansion. It’s the one place where no material is stretched (as on the outside of the bend) or compressed (as on the inside of the bend).
While most people will use programs like SolidWorks or Autodesk Inventor to create an unfolded version of their parts to be cut out, it’s crucial to understand that no software is 100% accurate. Manufacturers need to see the 3D model to understand what is critical for your part to be formed. K factor deviates depending on whether you’re using air bending, bottom forming, coining, or other techniques. Modern manufacturing software can calculate the proper ways to bend the material more effectively than programs like SolidWorks, so the manufacturer can “unfold” your design on their side and find the best steps to make it as you intended. To ensure the flat pattern is more accurate, manufacturers will also utilize lookup tables and calculators online for the K factor and input the more exact values into the CAM program.
Tip: Remember for 90-degree bends, the top die will be at an 88-degree angle to account for spring back. If you’re using a 90-degree angle, you’re likely doing bottom bending, so it’s best to use the bottom bending numbers when referencing K factor tables.
Notes on Design for Individual Features
The most common features designed into sheet metal fabricated parts include bends, holes, slots, and flanges and lugs. The table below shows the recommended number of material thicknesses that any feature should be set away from other features (for example, an edge should be at least 2x the material’s thickness in length away from a hole). Note that a flange in this case is the same as a bend edge.
![Sheet Metal Feature Clearances in Material Thicknesses[50].jpg Sheet Metal Feature Clearances in Material Thicknesses[50].jpg](https://eu-images.contentstack.com/v3/assets/blt0bbd1b20253587c0/blt30e834db8db5ac67/65140ceb40ca7c4c434b7372/Sheet_20Metal_20Feature_20Clearances_20in_20Material_20Thicknesses_5B50_5D.jpg?width=700&auto=webp&quality=80&disable=upscale)
Bending Design
The first thing to remember for bending design is that you will need to include information on whether your part's inner or outer dimensions are more important. For example, external dimensions will be crucial if your part must fit inside something else, while inner dimensions will be important if you’re planning to fit other things inside it. Don’t include both inner and outer part dimensions without specifying which ones are more important, though—software will often ignore the fact that the material has thickness as well as width and length.
It’s also important to remember that tolerances are not constant. Multiple bends, types of bend angles, holes, and even linear dimensions and diameter will affect them. A general rule is that you want to maintain a ratio of 1:1 material thickness to a bend, so for a 1-inch-thick plate you’ll want at least an inch on the internal radius on the bend. If you have no other choice, a bend can even be 1/32nd under the material’s thickness. However, this adds risk unless you’re using specialized tooling, so it’s best to go with higher radii.
Tip: To save time and money, make bends identical. Doing the same bend twice can be part of a single operation, so it will save time in adding multiple die setups.
Lug and Flange Design
For lugs and flanges, try to ensure that the material’s grain direction is perpendicular to the bend. Otherwise you’re at greater risk of cracking the material. Flange length should be about 4x the material thickness at a minimum, both for safety and ease of manufacturing. Bending with a brake (which uses a V-shaped block) requires the metal to be long enough to extend along both sides of the V for support. Shorter flanges may need to be pulled instead of bent.
Hole and Slot Design
It’s common for manufacturers to see designs where holes and slots are placed too close to edges. As the table above notes, you’ll want any hole to be located at least 2x the material thickness away from an edge and 2.5x the thickness away from a bend edge. A slot should be 4x the material thickness away from a bend edge. If these features end up too close to a bend, they can be distorted from the stress in the material.
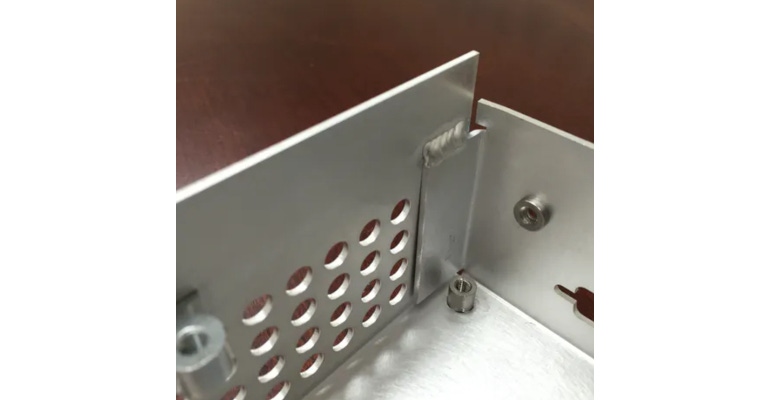
If a hole or slot must be within those widths to a bend, notch relief cuts can be used to maintain the feature’s integrity. Otherwise, holes can become ovals or the lip closest to a bend will flare out. These distortions will make it especially difficult to install hardware in that hole later.
Relief-Cut Design
Every time you bend, you increase stress on the material, so relief cuts allow you to limit the stressed areas on a part. These cuts may come in the form of notches across the material's surface. Other relief cuts into the sides of the material (either as notches or circles) will relieve bulging when it’s folded. These cuts or notches should also be wider than the material’s thickness.
For features such as holes and slots, notch-relief cuts can help avoid having those features flare outward at the edge nearest to where the part is being bent. If you want to protect the flatness of an area with a hole, you can do a square of relief cuts around it.
Countersink Design
You can also add countersinks to a part, though you want to avoid counterbores. Countersinks and counterbores are used in attaching fasteners or for deburring. A counterbore will require CNC milling, adding expense and complications. Countersinks can be up to 60% of the material’s thickness deep, and they should be at least 8x the material’s thickness away from the edge or a hole or slot.
Corner-Fillet Design
Corner fillets should be at least half the material thickness, both for internal and external fillets. These features are commonly included for welding, for safety considerations (to avoid injury from sharp edges), or for aesthetic purposes.
Forming and Stamping Design
Forming and stamping will add additional shape to your part. These processes can be used to create gussets (which act like ribs), joggles (which offset the plane by one material thickness), hems (which help stiffen your part), louvers, curls, external curves, and forming wraps. If possible, aim for angular features since they’re less expensive to create.
Forming and stamping both require die sets, so creating them will increase upfront costs. Your initial lead time will increase as well, owing to the extra time required for die fabrication. Stamping is better for higher production runs, as you can add multiple features using a single operation, lowering the unit cost over larger production volumes.
Working Toward Metal Fabrication Success
Keeping to these best practices will help both machines and their operators fabricate the exact parts you need, whether they’re experienced fabricators with standard machines or those using advanced smart machines to aid and speed up production.
About the Author(s)
You May Also Like

.jpg?width=300&auto=webp&quality=80&disable=upscale)

