The Instagif NextStep-- Building a Camera That Takes Animated GIFs
Animated gifs are everyone's new favorite thing on the Internet. But they're rather intangible. But Gadget Freak Abhishek Singh built a camera that takes gifs you can hold.
September 12, 2017
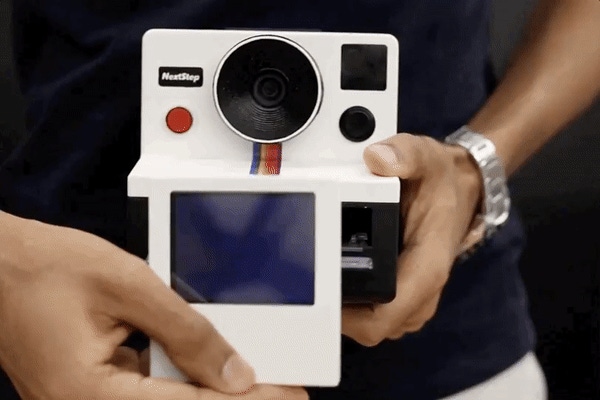
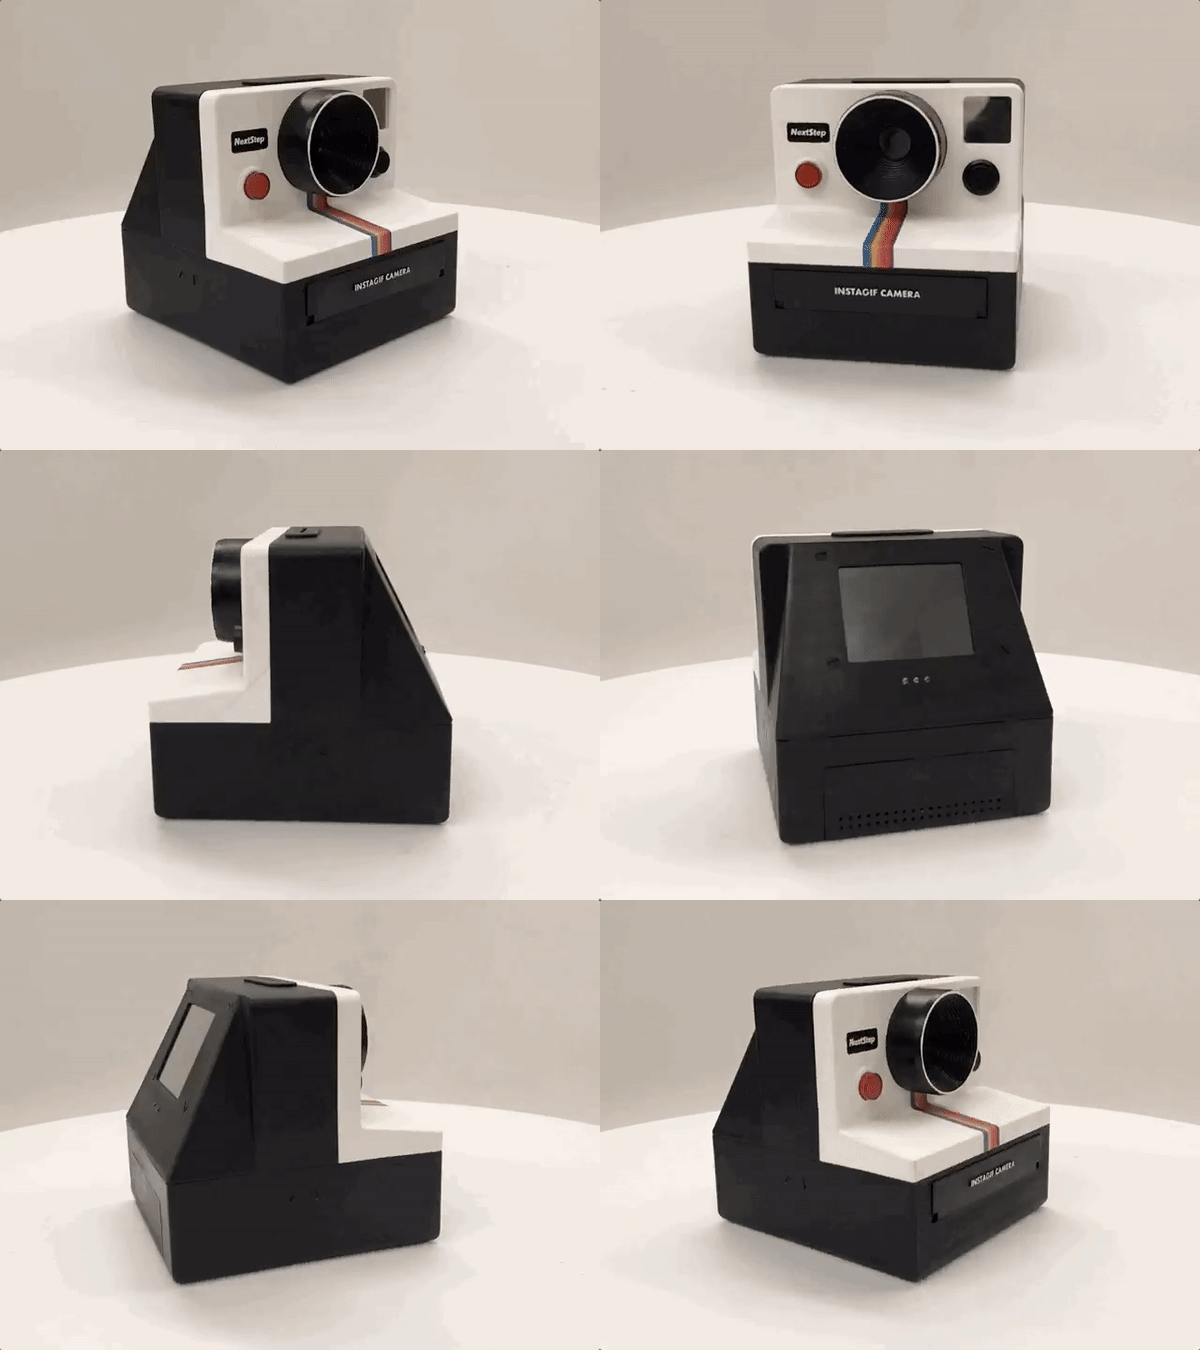
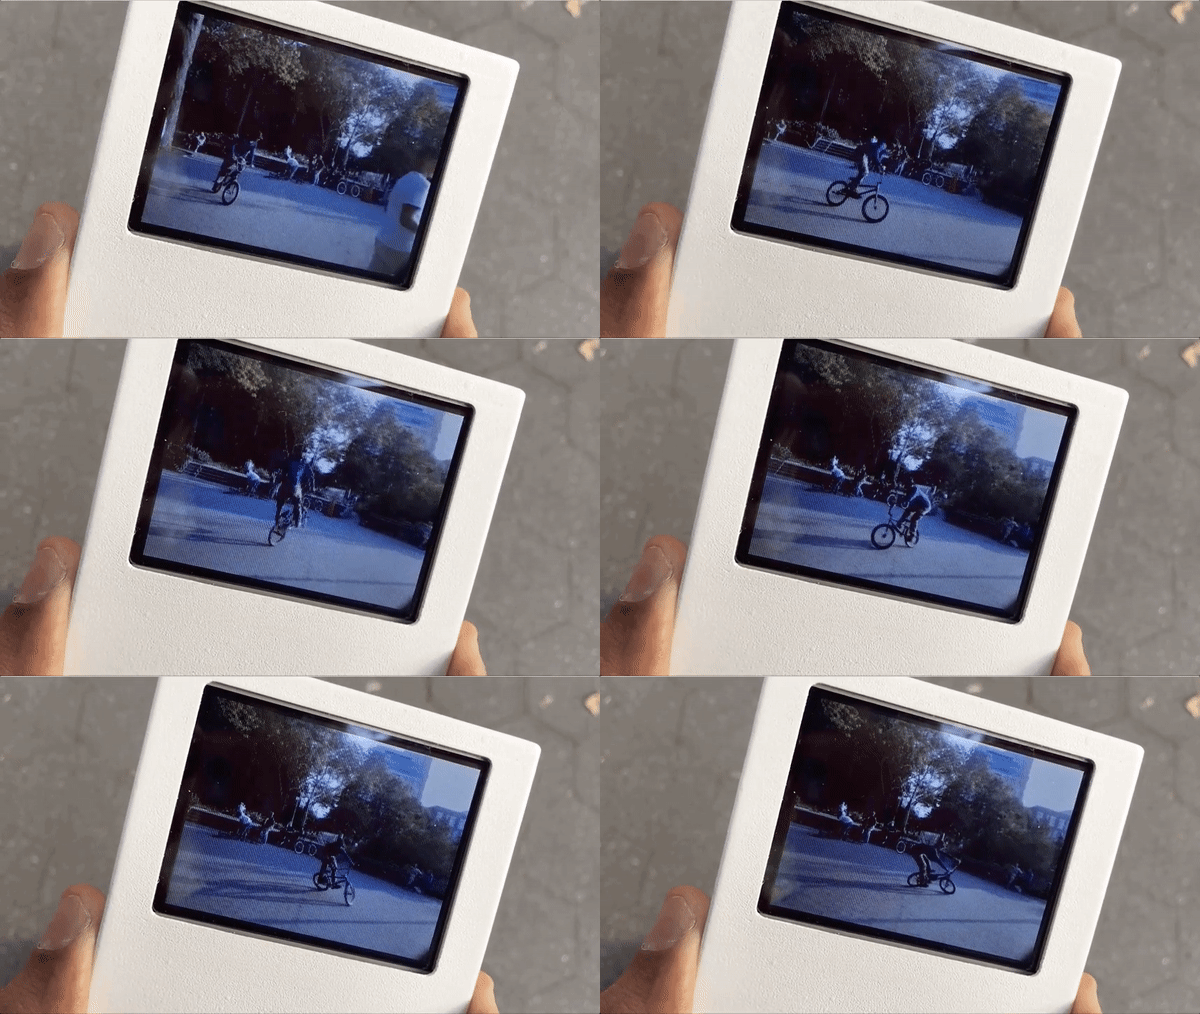
I built a camera that snaps a GIF and ejects a little cartridge so you can hold a moving photo in your hand! I'm calling it the "Instagif NextStep." Don't ask me why I built it, it sounded like a fun challenge and I always wanted to hold a moving photo.
If it wasn't obvious, I was inspired by the Polaroid OneStep. What I love about these kinds of projects is that they involve a bunch of different skill sets and disciplines - hardware, software, 3D modeling, 3D printing, circuit design, mechanical/electrical engineering, design, fabrication, etc. that need to be integrated for it to work seamlessly. Ironically, this is also what I hate about these kinds of projects. I have detailed all the steps here and have released all the code, eagle files and design files so you can create your own.
Here's a short video of the camera in action:
How it Works:
Rather than going into the details of the code, let me explain how the entire system works on a high level:
The system uses two Raspberry Pi's: One Raspberry Pi 3 in the camera (aka CamPi) and one Raspberry Pi Zero W (aka SnapPi) in the cartridge. These two Pis form an ad-hoc WiFi network on bootup that allows the Pis to communicate with each other without needing the Internet, and you can still SSH into them.
Startup scripts in both Pis also run the needed scripts. The CamPi is running a Python script and a node script that inter-communicate over RPC. The node script handles all the socket connections and GPIOs and the Python script handles the camera control. The node script lets the Python script know when a button is clicked to start/stop recording.
When the button is pressed, a three-second GIF is recorded. It is converted and compressed on the faster CamPi (Pi 3) and then served over the ad-hoc network so the SnapPi can download the file to itself. Once this process is complete, the servo is signaled by CamPi to eject the cartridge out so it can be viewed.
A socket message is sent by the CamPi to the SnapPi to begin playing the GIF, which begins fading in like a Polaroid picture. If you take another GIF with the cartridge in the slot, it will simply replace the old one, so technically you have infinite GIF taking abilities.
All the code is available here.
I have a step-by-step setup guide in the repository as well that will take a few hours to complete but will get you up and running without pulling your hair out.
PARTS LIST:
Part | Quantity | Digikey Part # |
Camera Parts: |
|
|
Raspberry Pi 3 | 1 | |
Raspberry Pi Camera Module v2 | 1 | |
1 |
| |
M3 hex nuts - McMaster Carr 90695A033 |
|
|
M3 screws 16 mm - Mcmaster Carr 95258A126 |
|
|
iPhone Lens x0 . 67 | 1 |
|
Male/Female Header Pins |
|
|
Resistors 220 O | 2 |
|
Resistors 100k | 2 |
|
Resistors 10k | 4 |
|
Jumper Wires |
|
|
2 |
| |
Adafruit 2.8" PiTFT | 1 | |
Pogo Pins |
|
|
3 |
| |
1 |
| |
1 |
| |
|
| |
Micro USB Breakout | 2 | |
2 |
| |
|
|
|
|
|
|
Gif Cartridge Parts: |
|
|
1 |
| |
8GB SD card (class 4 or higher) | 1 |
|
1 |
| |
Adafruit 2.8" PiTFT | 1 | |
1 |
| |
1 |
| |
|
|
|
Tools: |
|
|
Soldering Iron |
|
|
Desoldering Gun/Solder Sucker |
|
|
Screwdriver set |
|
|
Crimping tool |
|
|
Pliers |
|
|
Exacto Knives |
|
|
Sand Paper(400-1200 grit) |
|
|
Tweezers |
|
|
Acrylic Spray Paints (Black and White) Krylon or Montana Gold |
|
|
|
|
|
|
| |
|
|
BUILD INSTRUCTIONS:
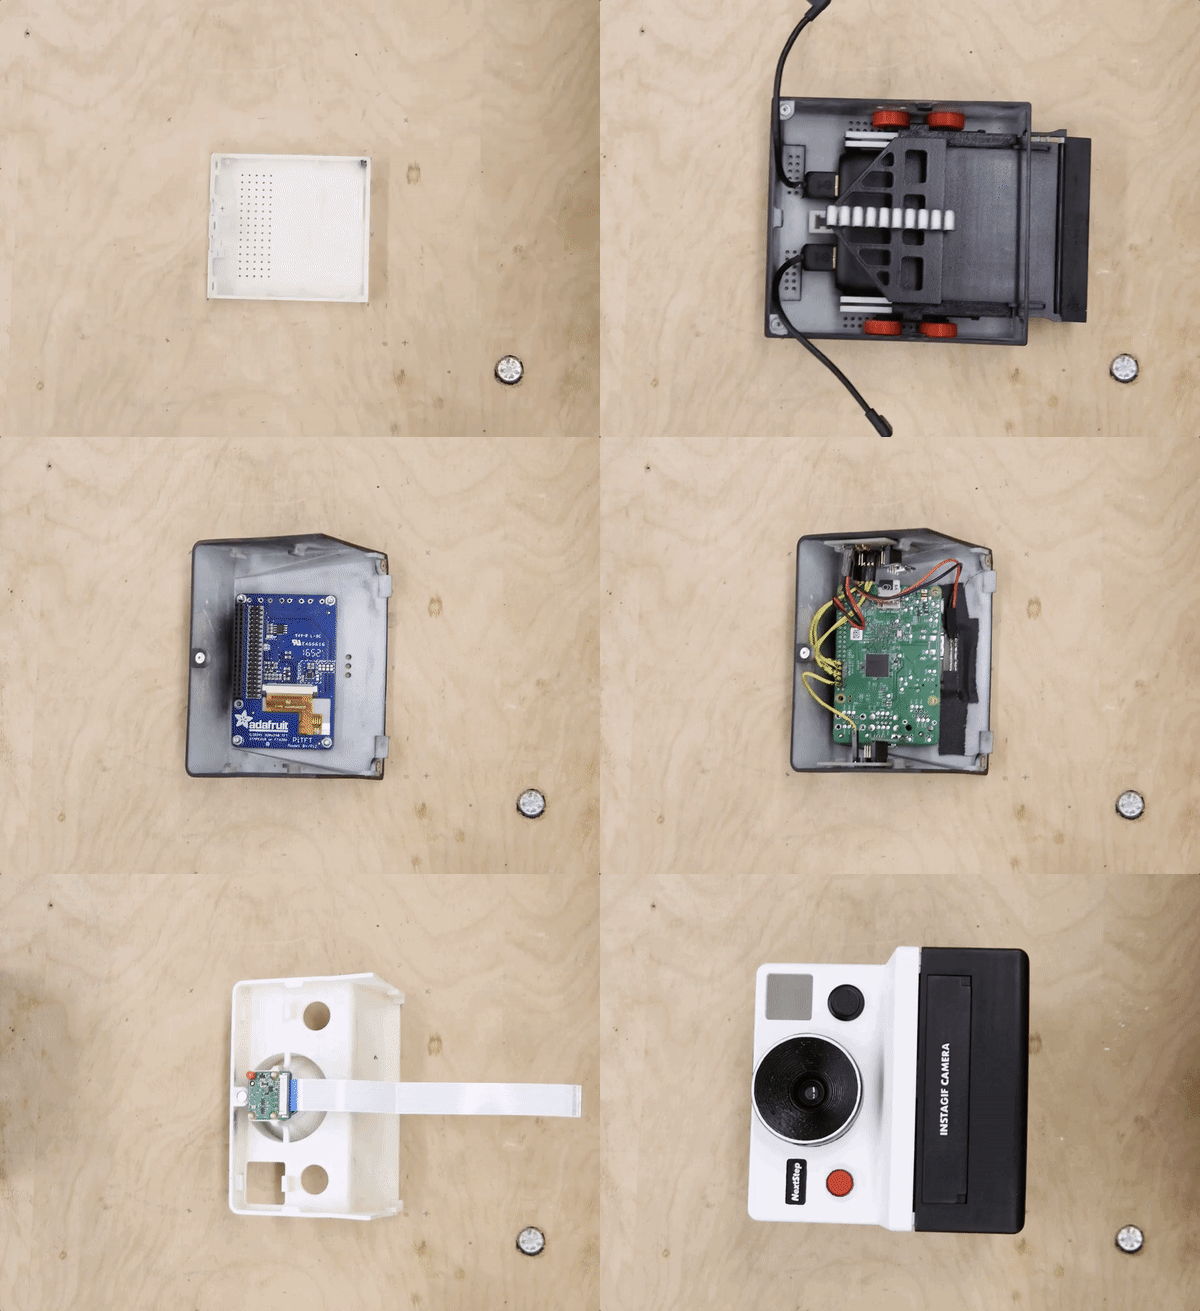
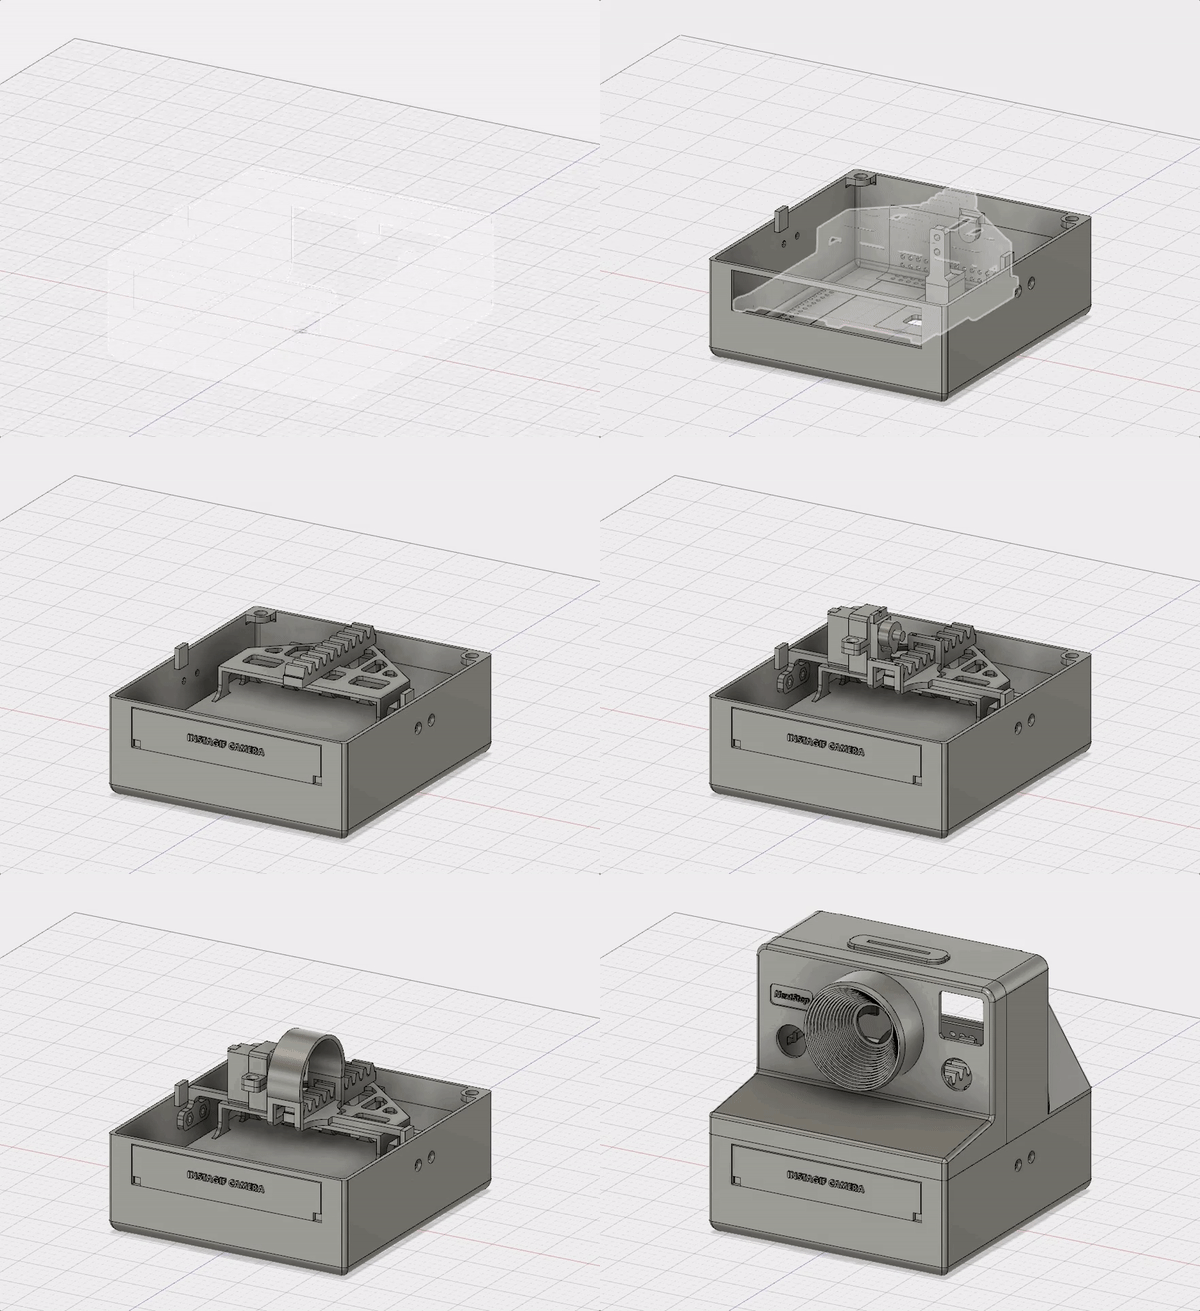
I thought I'll start off with the entire assembly and then break down the different elements. As you can see, everything is assembled from the base up in layers helping in easy assembly and quick disassembly for troubleshooting
Designing in 3D
Paper sketches help a lot along the way. There aren't many screws needed in this build and most parts snap together using small but powerful neodynium magnets The entire thing was modeled in Autodesk Fusion 360.
Ejection Mechanism
I spent quite a bit of time trying to figure out the ejection mechanism so the cartridge could slide out of the camera. As always it was important to me that the final camera wasn't too large so I needed something that saved space and still did the job. I experimented with linear actuators but eventually settled on a rack and pinion mechanism that I placed in such a way that it conserves space.
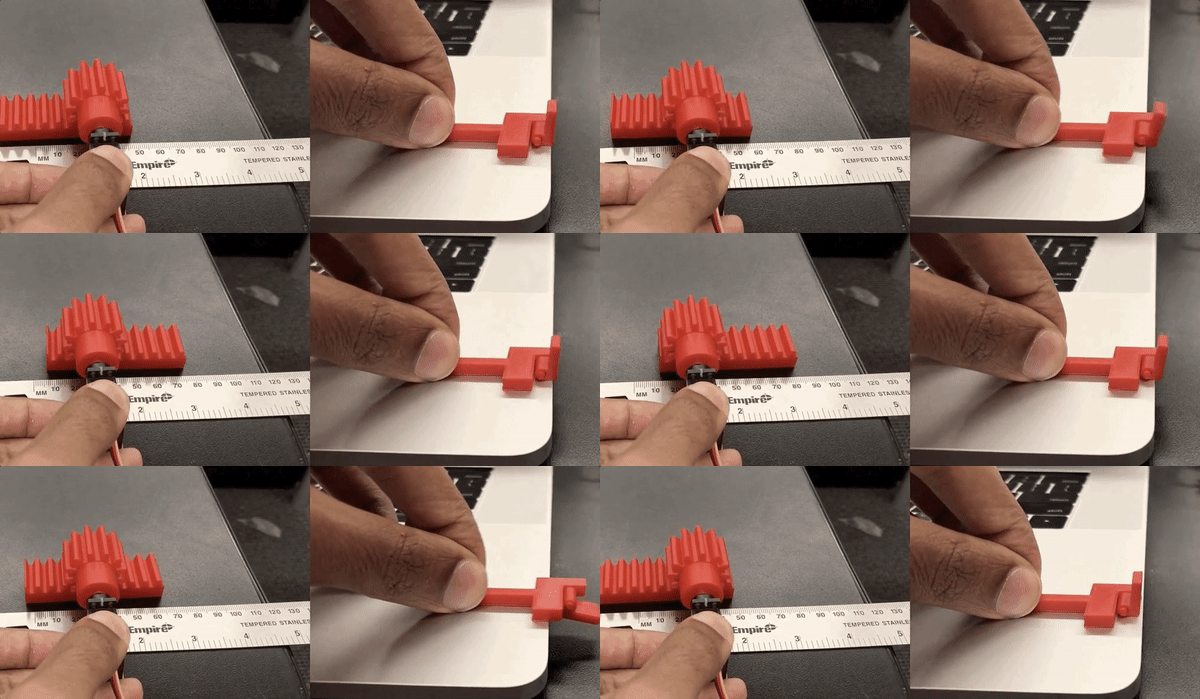
I also had trouble figuring out how to prevent the cartridge from sliding out if the camera was tilted forward. It needed some kind of stopper in the front. I considered a mechanical arm but I didn't want to add an additional servo just for this purpose. I also considered adding a magnet at the back that would keep it in place. Eventually I found a simple, elegant solution which you can see prototyped in the GIF. Didn't need any additional mechanism.
Underestimating Physics
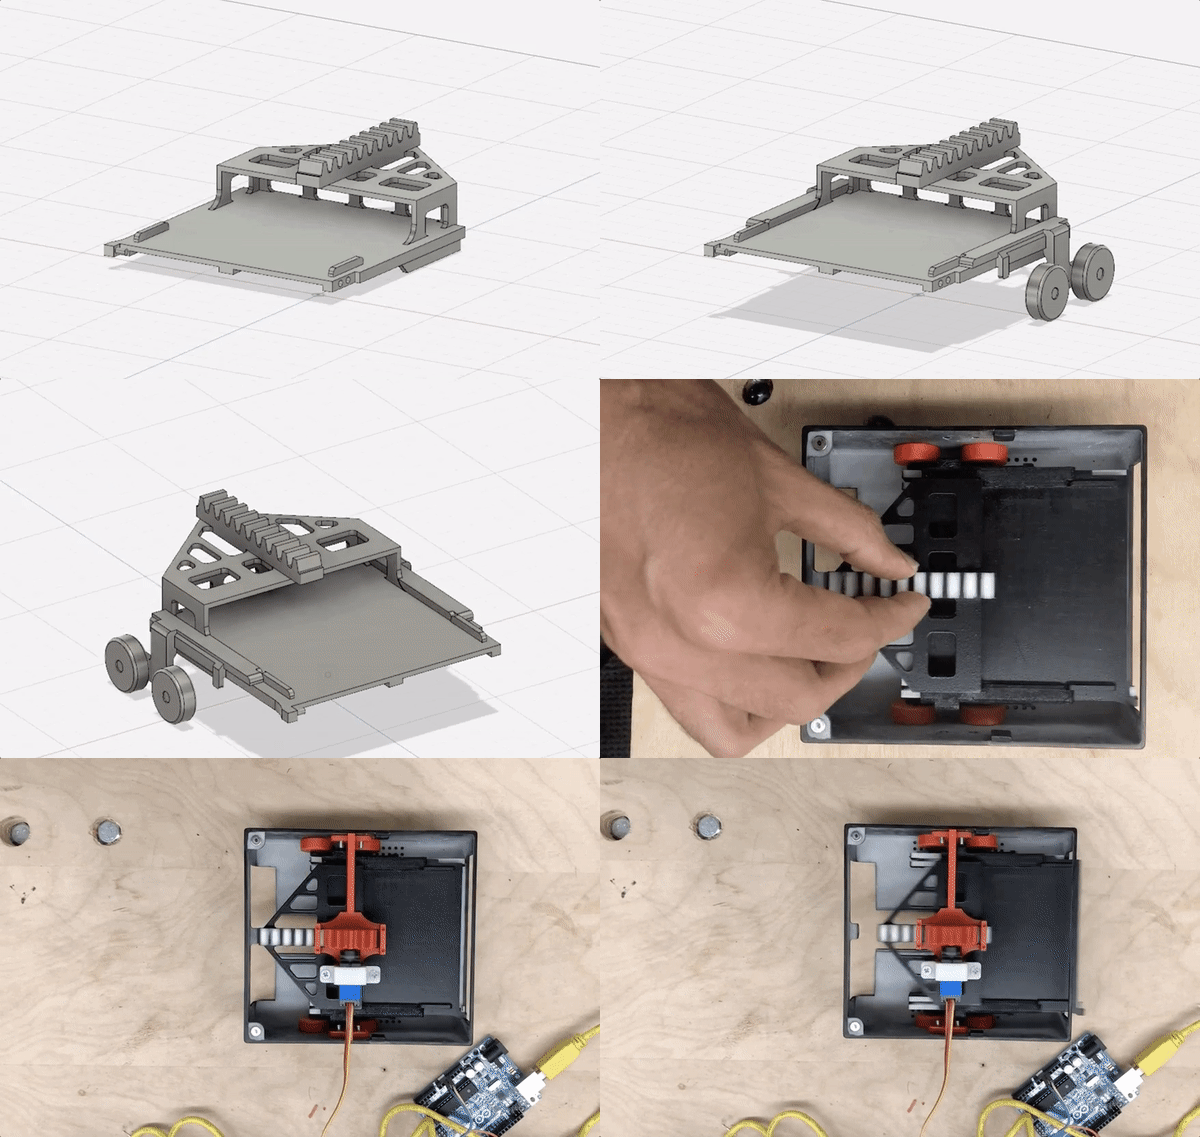
This was the final sliding platform. The wheels were actually added later (post 3D printing) when I realized I had completely underestimated and ignored friction! The platform was getting badly stuck while sliding on the bottom rails it was placed on causing the servo to burn out. After some design iterations, I was able to come up with a solution that involved printing additional wheel attachments and gluing it to the existing platform with epoxy. The friction issue was solved!
Sketching Up Layouts
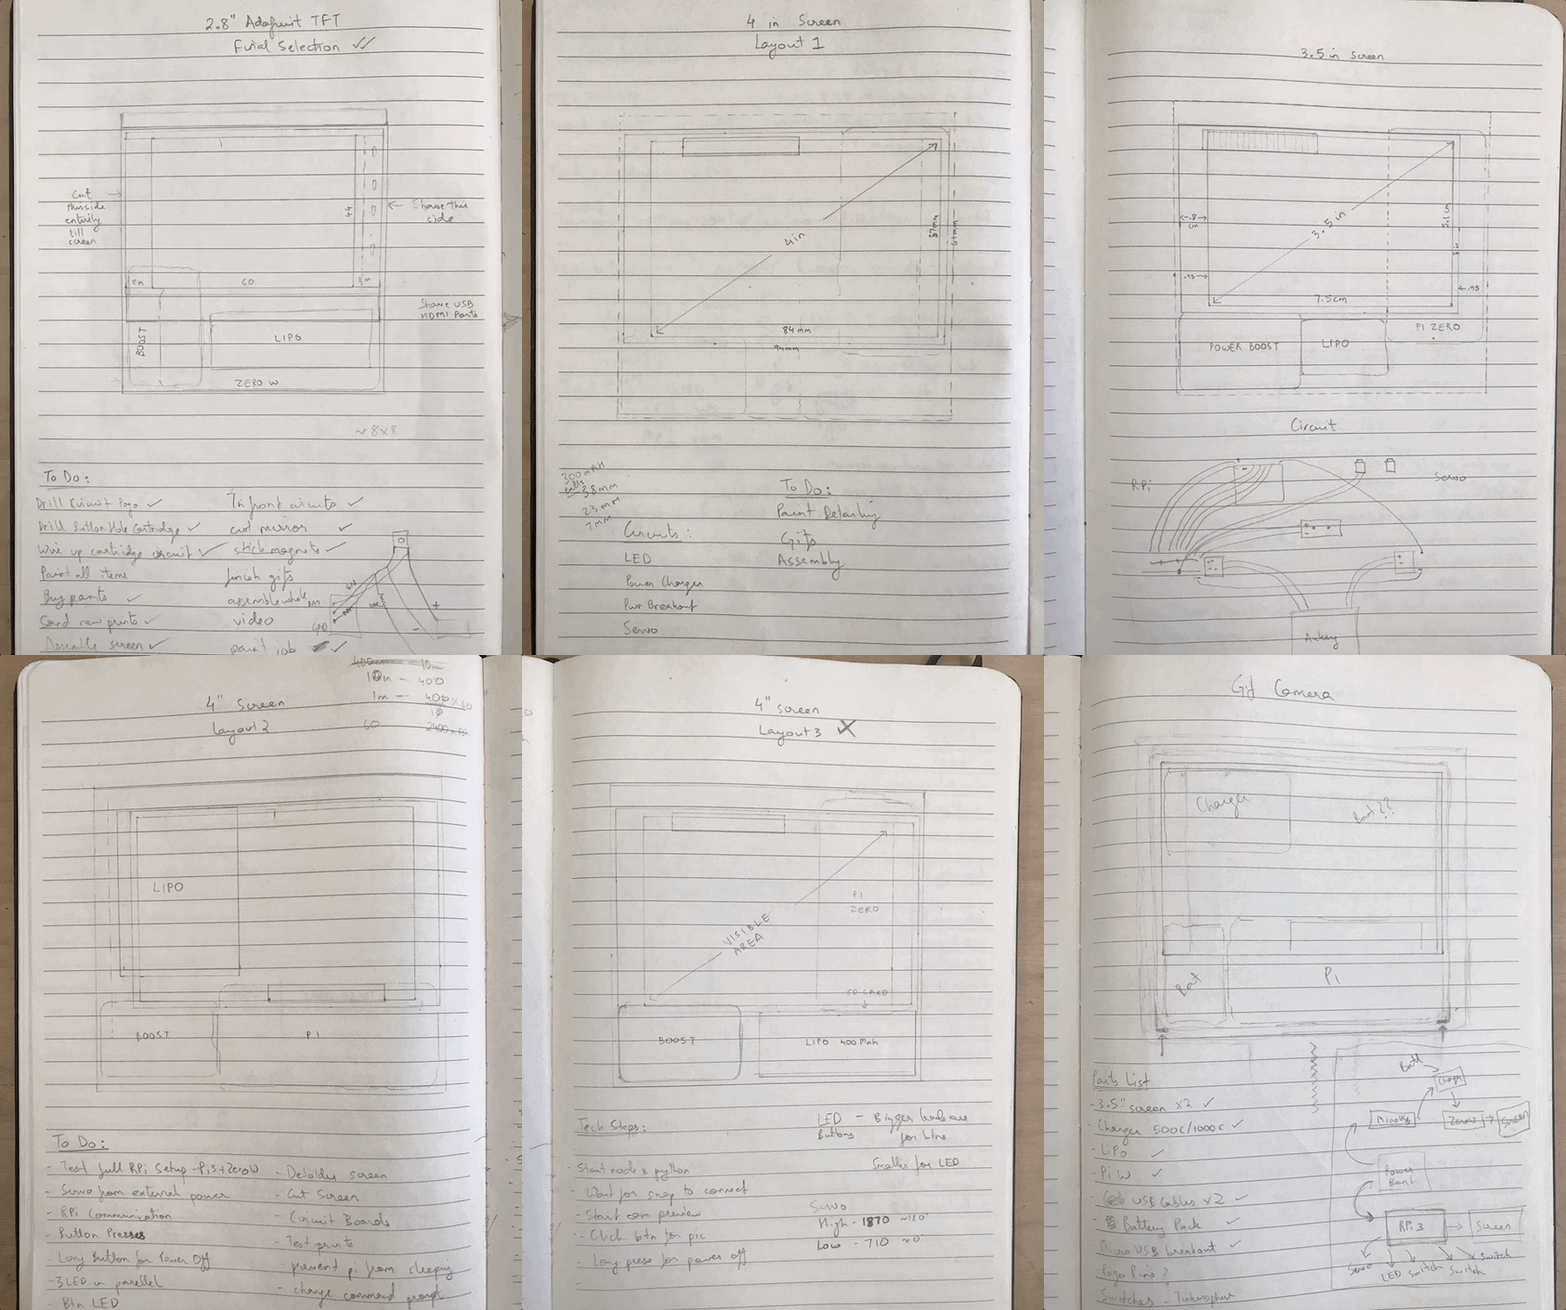
I also spent a lot of time figuring out how to make the cartridge as small as possible. Ultimately the size of the cartridge would also define the size of the entire camera. I did a bunch of sketches of the cartridge, laying out all the elements in different permutations to squeeze out every millimeter. This was also the time I spent pulling my hair out experimenting with different screens for the Raspberry Pi. I tried a bunch of screens in different sizes: 2.8", 3.5", 4".
Word of caution: A Raspberry Pi's SPI interface can't handle fast refresh rates on screens with resolutions higher than 320x240. Viewing videos/gifs will be dismal with huge lag and visible frame refreshes. This meant that 2.8" was the largest usable screen. I found this out the hard way. With more sketches, I finally found a layout that would work while keeping the cartridge size small.
The Component Massacre
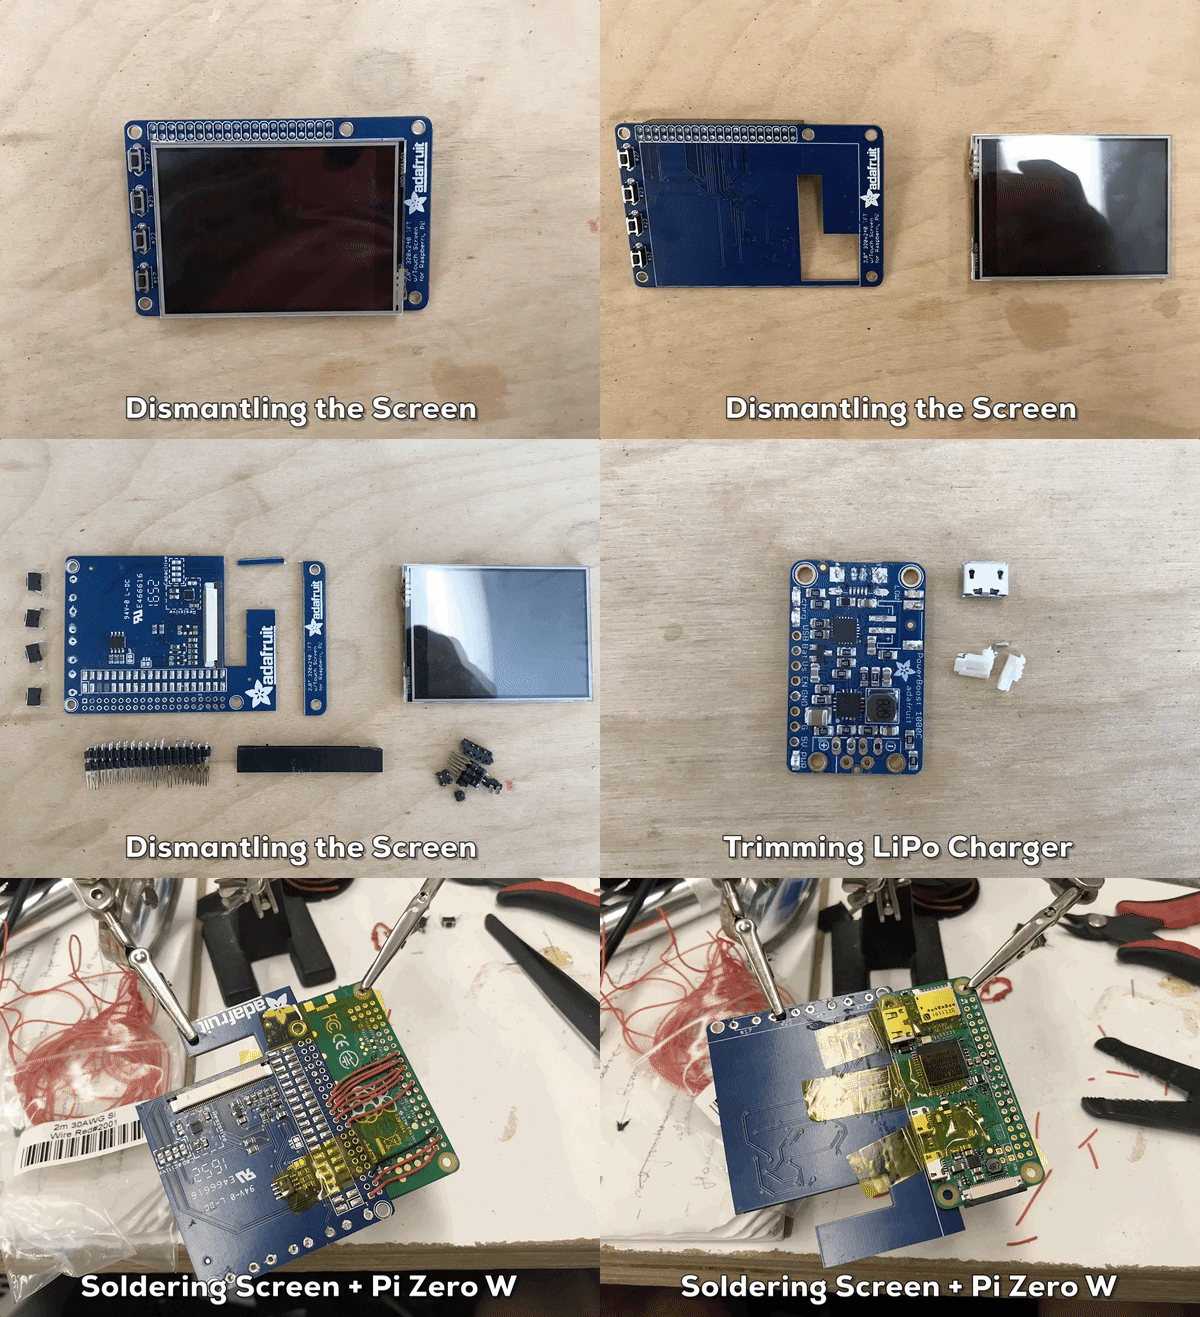
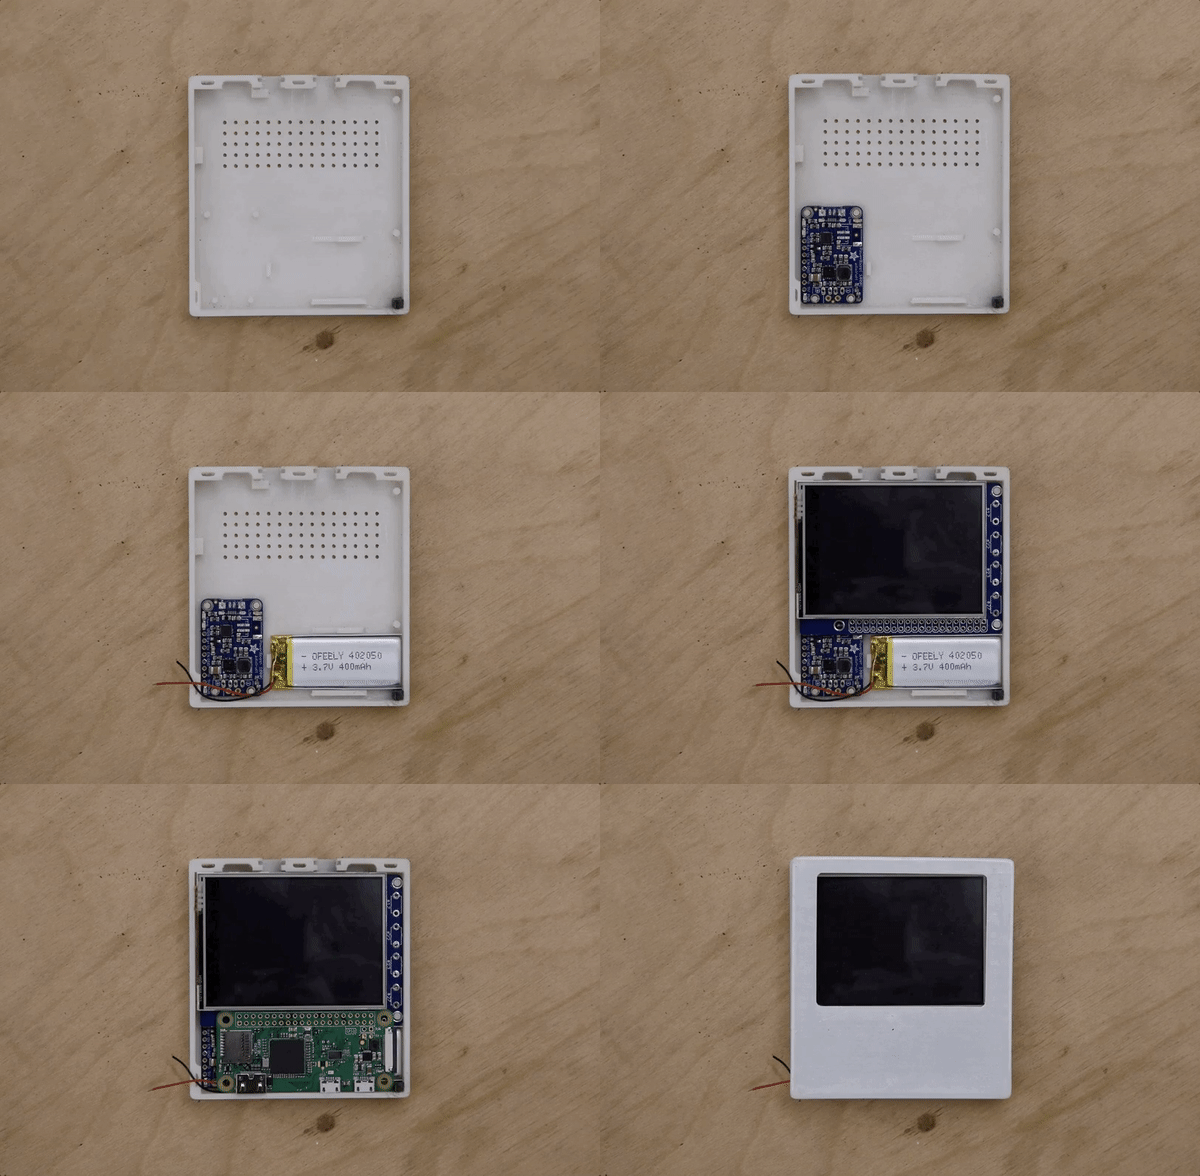
To achieve the desired cartridge layout, some amount of abuse was required of every component that needed to fit inside the cartridge:
1.) PiTFT Screen - I dismantled the screen, removing all header pins which were adding a ton of height and cutting off the excess PCB. The Pi was then soldered to the screen.
2.) PowerBoost 1000C charger - Again unneeded components that added height - the micro USB and JST connectors were removed. I soldered the wires straight to the breakout pins.
3.) Raspberry Pi Zero W - The micro USB ports were sanded down to reduce the ~2mm overhang they have over the PCB to reduce overall width. I figured as long as I only touch the casing and stay away from the contacts it should be fine. The HDMI port was massacred with the top part of its casing removed completely. This reduced the overall height by another ~1.5mm. Also the sides of the PCB was sanded down just a bit.
4.) LiPo Battery - I spent a lot of time trying to find the perfect battery. The one I found had the perfect combination of size and amperage to work in the design.
5.) Momentary switch - The 6mm momentary switches that powers the cartridge up was sanded down and excess casing was clipped off. It is placed at the top edge of the cartridge right between the two copper charging plates.
Packed like Sardines
Here you can see the mutilated components being laid out inside the cartridge. During final assembly all these components were soldered together as one circuit and placed in the cartridge.
Charging the Cartridge
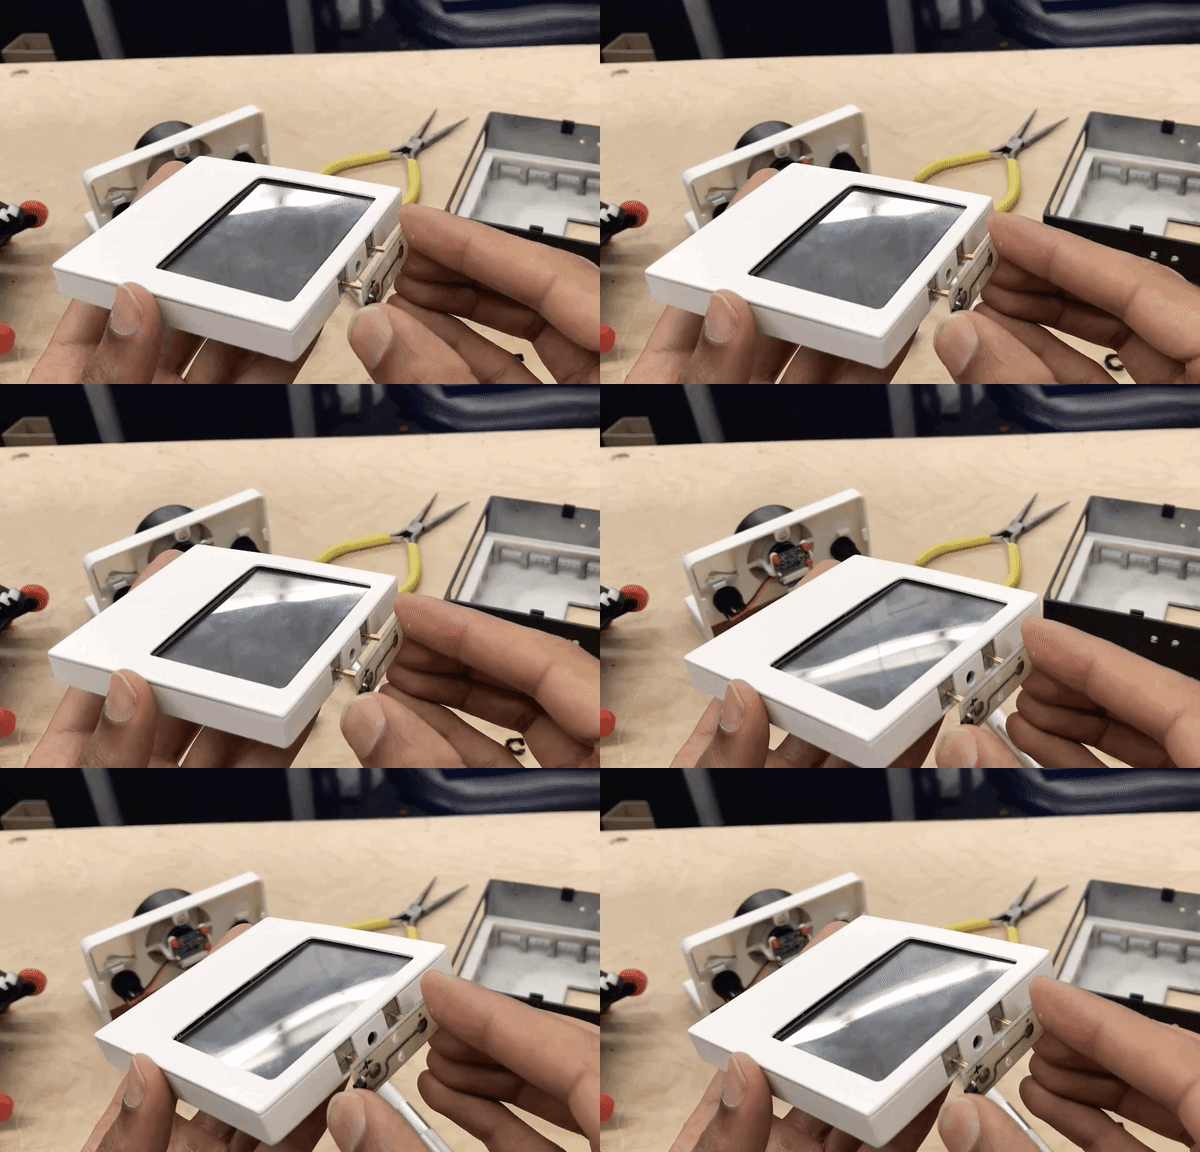
The cartridge has its own 400mAh LiPo battery. I used pogo pins to connect this battery via two tinned copper plates to the main power bank in the camera which is a portable 10000mAh supply. I used pogo pins as they provide some give while ensuring contact.
When the cartridge is inside the camera it gets powered by the large powerbank and the battery gets charged, - When the cartridge is ejected it's own LiPo takes over to power it. I followed the steps in this GitHub repo to get the system working in the cartridge. The repo explains it well.
Extending the Headers
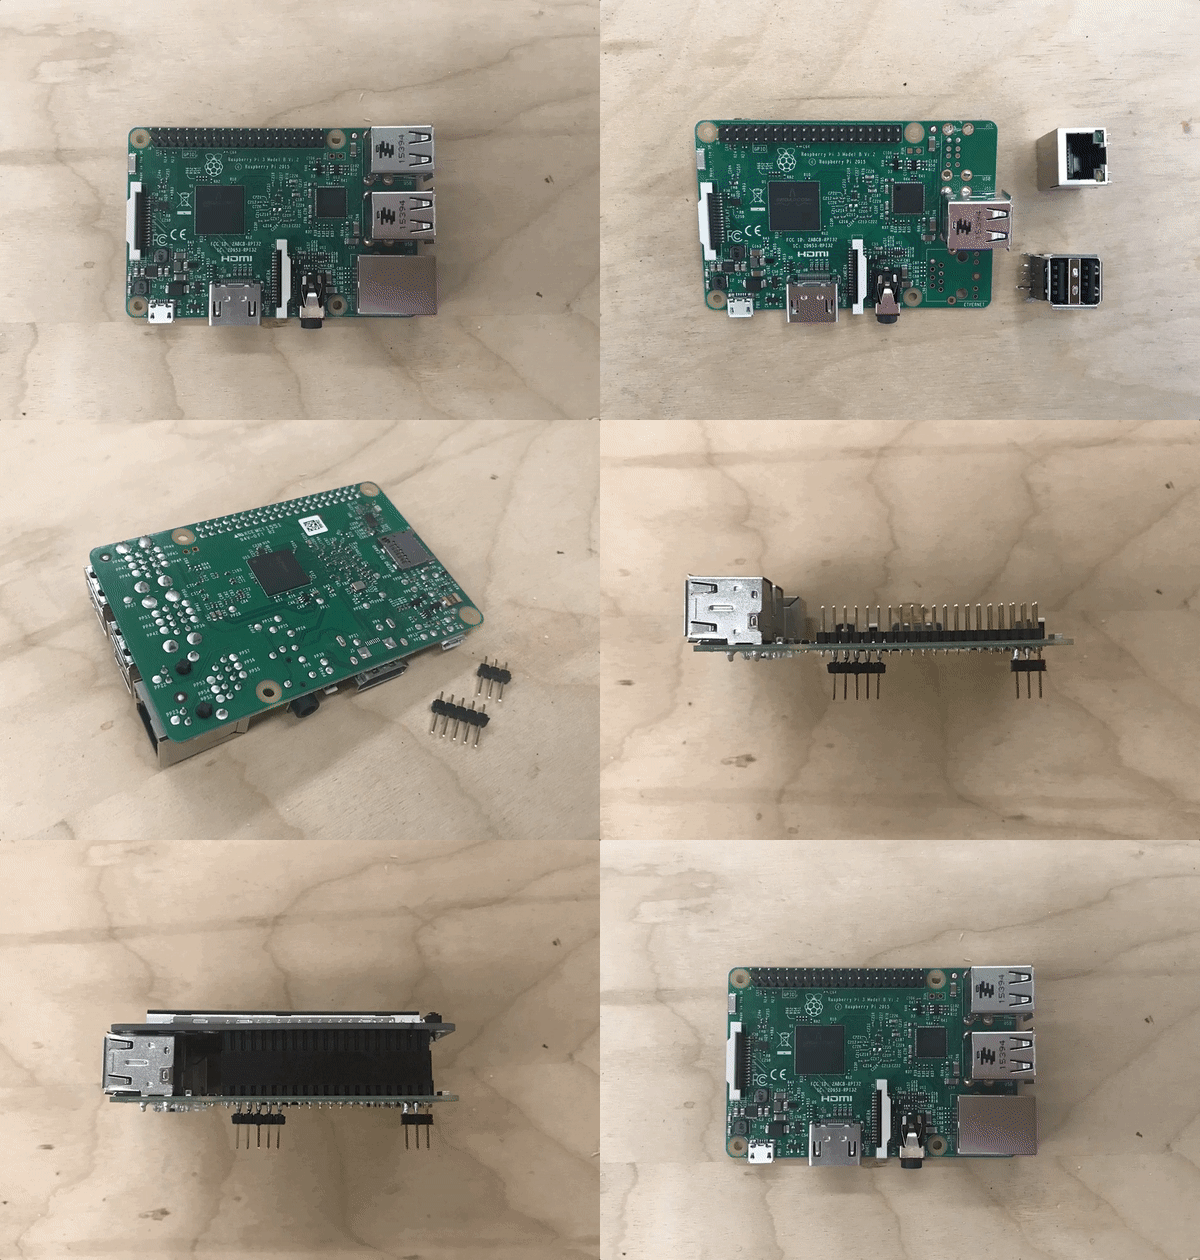
The Raspberry Pi 3 also went through its fair share of alterations:
1.) I removed the ethernet port and one of the dual USB ports. This was because the mounting holes of the screen were located exactly there and I needed these holes to screw the screen to the camera chassis.
2.) The other problem that the screen caused was that it blocked all the pi's header pins even though it actually uses only about 8 pins. Since I needed access to the GPIOs, I extended the header pins out the other side, making plugging and unplugging wires a breeze.
Homemade Circuits
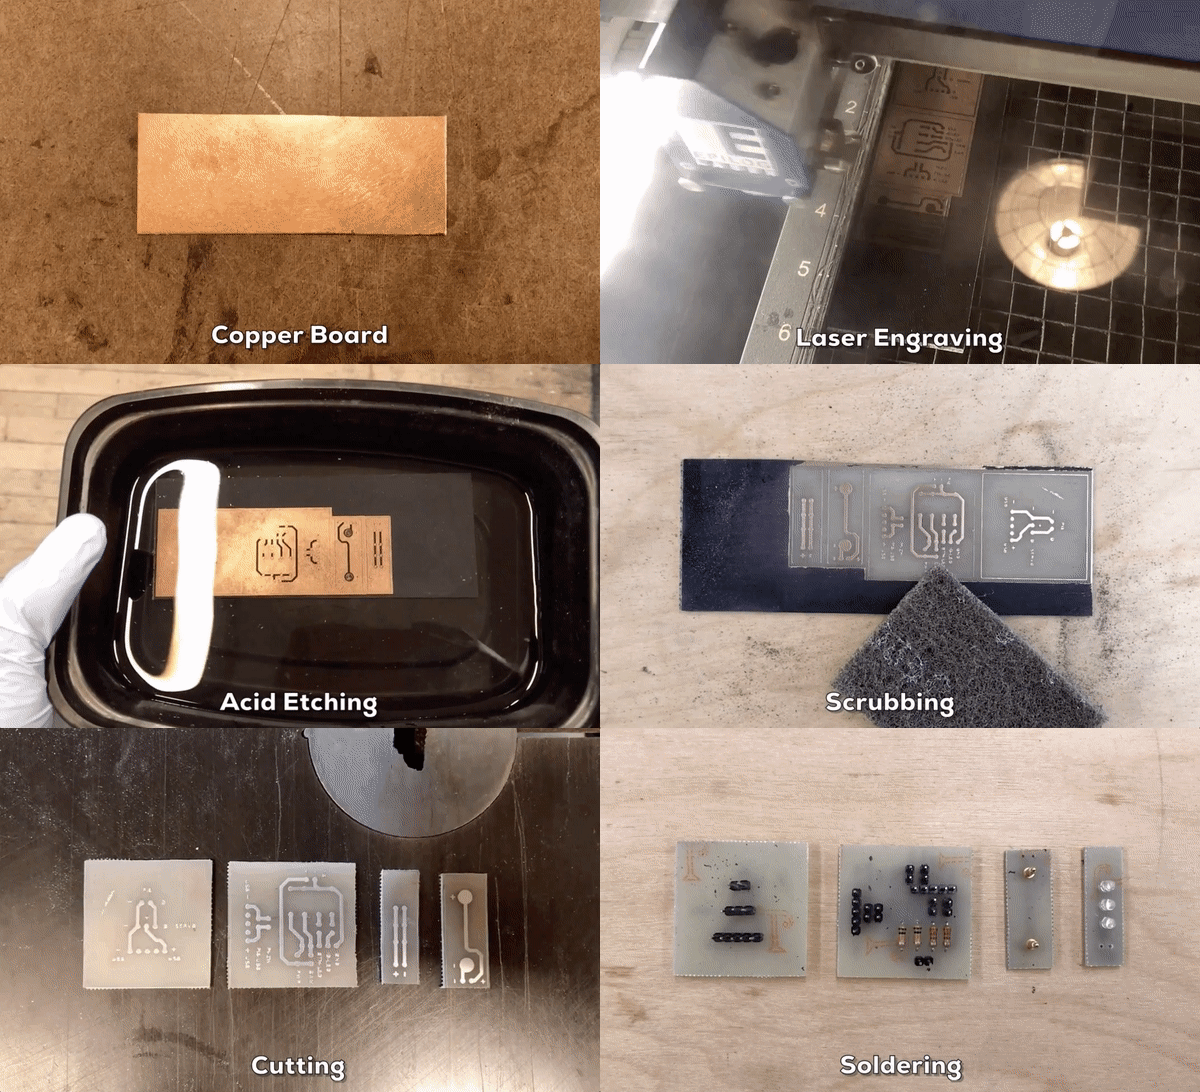
The pogo pin connector was just one of 4 circuits that I ended up building. They are simple breakout boards but necessary for managing wiring and distributing power.
1.) Micro USB Breakout Board: Takes the power from the power supply and distributes it to the two pis. It also handles the GPIO inputs/outputs on the Pi 3
2.) Micro USB Breakout Board: Takes power from the second USB port and powers the servo. It was important to keep the servo and pi power separate as current spikes caused by servo usage can be dangerous. The boards share common ground.
3.) LED Notification Board: The notification LEDs on the rear. It connects to the first circuit.
4.) Pi Zero Power Transmitter: It transmits power to the GIF cartridge via two pogo pins. It connects to the first circuit The entire process is detailed in the GIF but a few points to note: You don't need a laser cutter and can use a laminator/hair straightener to do the toner transfer. The acid solution is two parts hydrogen peroxide and one part muriatic acid 3) You can just use perf boards instead since I only used through-hole components. Here's the Github Repo for the eagle files.
Printing the Parts
The parts were printed using a Projet 7000 SLA printer at Laguardia Studio NYC. This material is easy to sand and paint, though it can tend to warp in load bearing areas over time. I made sure there weren't any areas taking on too much weight and moving parts were printed using PLA on an Ultimaker 2+. I kept tolerances at 0.1mm. Here's the Github Repo for the STL files:
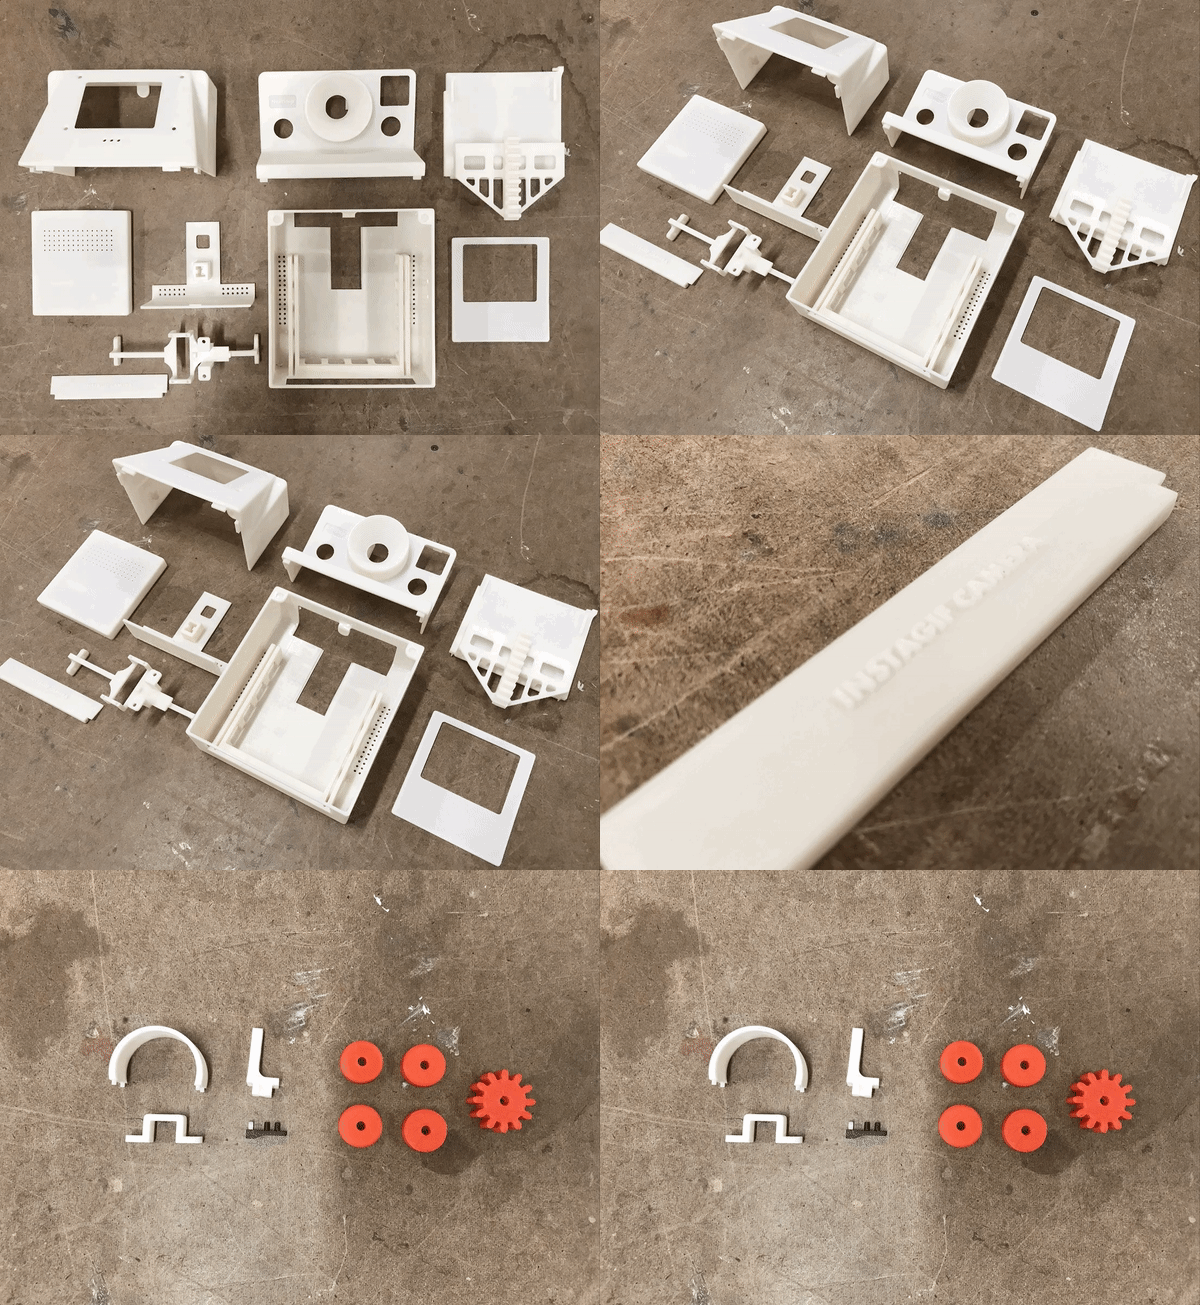
Painting the Parts
The parts were wet sanded with grit ranging from 400-1000. I painted them using Montana Gold white and black matte acrylic spray paints. I did one more round of wet sanding with 1000 grit paper. Masking tape was used to isolate certain areas. Final detailing was done with a fine brush and white acrylic paint. I figured that a black sharpie worked really well for touching up defects in the black paint. While I bought two identical backlit red LED buttons that are inserted in the front, I painted one completely black.
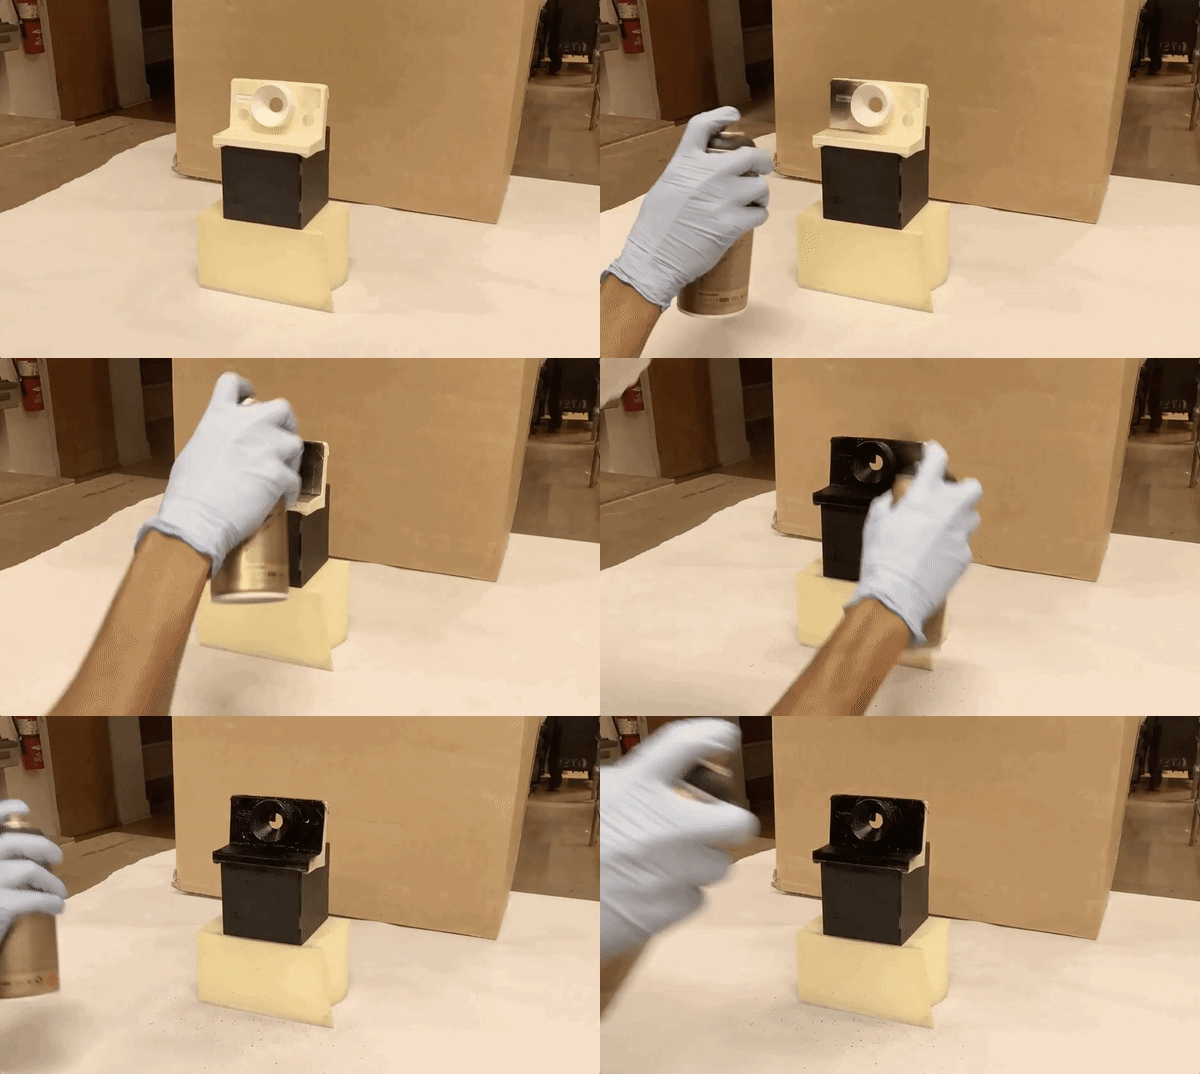
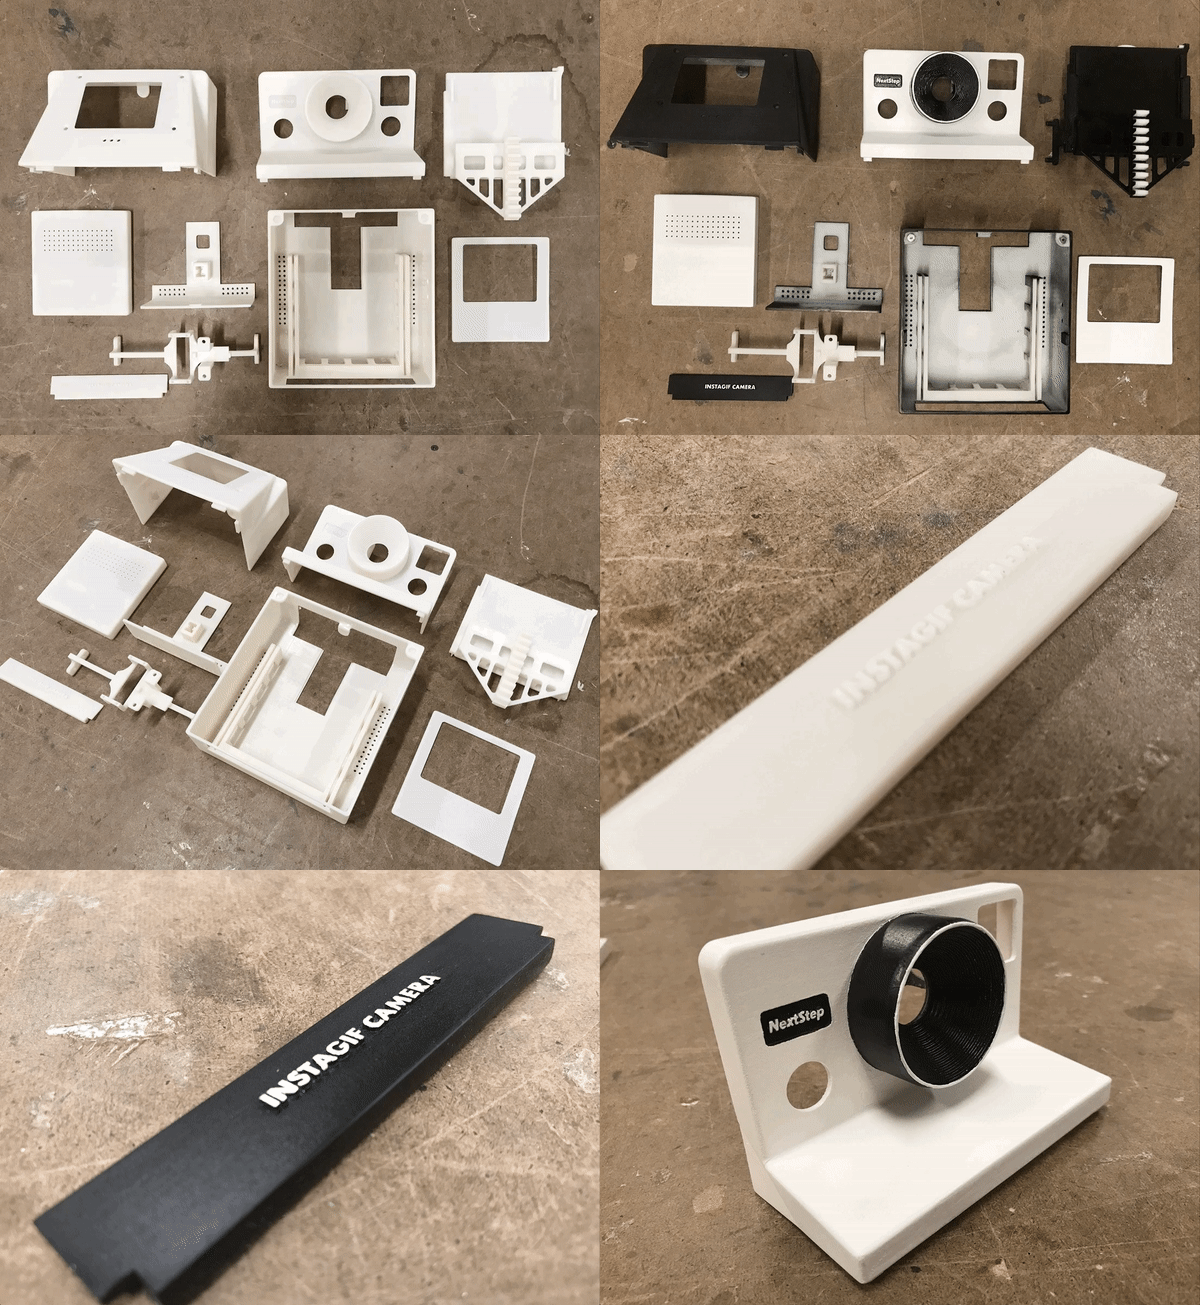
Before and After
Here you can see the results before and after painting. The rainbow stripe was added in the end by printing it on a sticker vinyl paper and then covering it with transparent matte scotch tape so the ink doesn't chip.
The Problems Never End
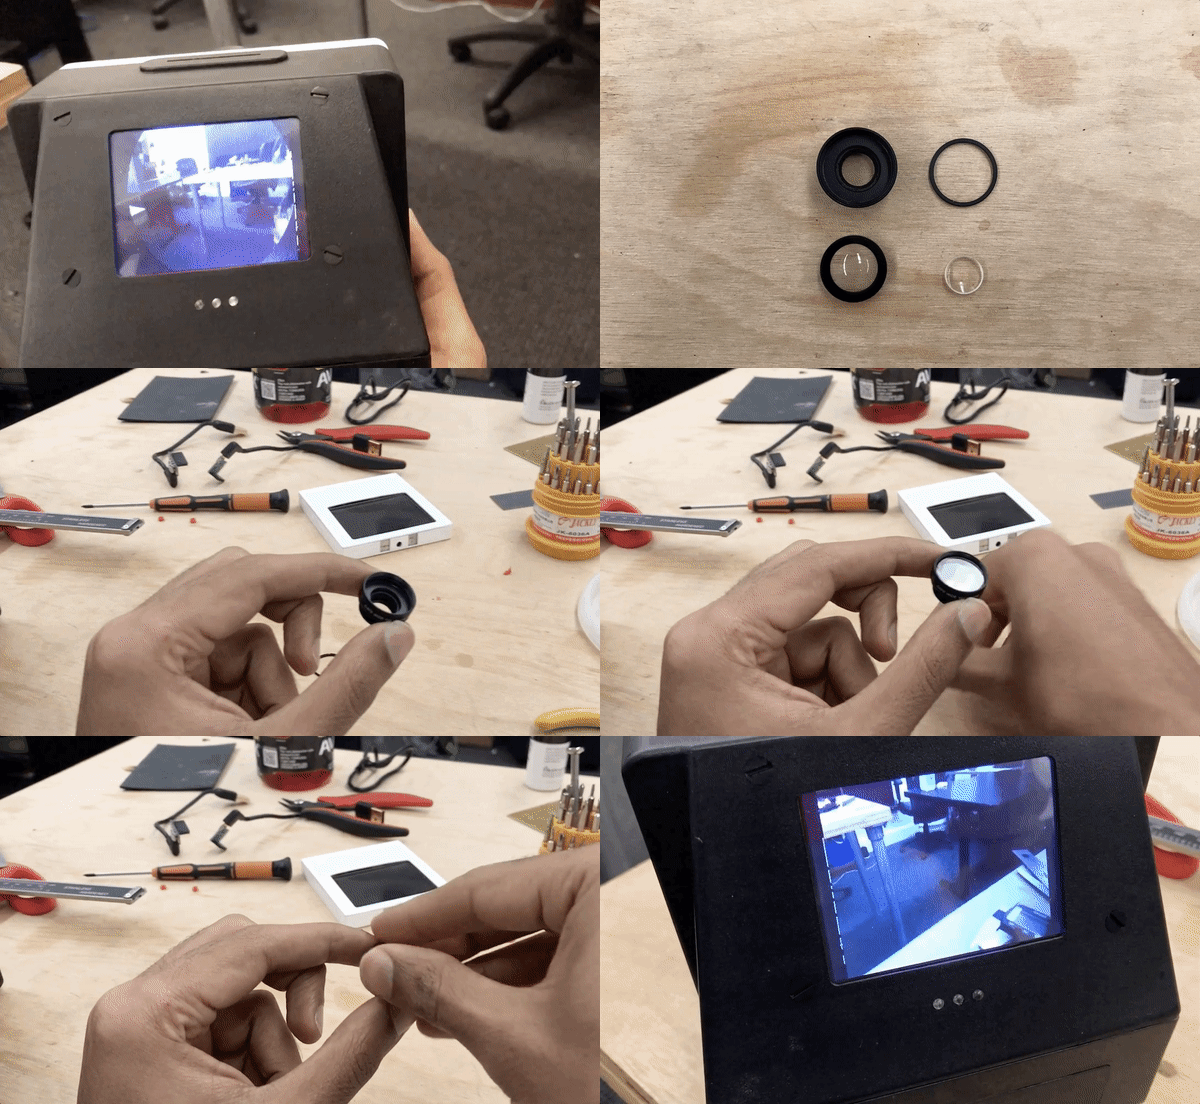
I added a wide angle lens to the Pi camera but this resulted in a hideous rim from the cylindrical camera body becoming visible in the view. However I needed the lens primarily for its case as the design required it and it also hid the Pi camera nicely behind it. The solution:
1.) Dismantle the entire lens and discard the two lenses in it
2.) Cut a circular piece from 3mm clear acrylic the same size as the lens
3.) Replace the lens with this acrylic piece
4.) Reassemble the lens case This solved the wide angle problem as well as allowed me to continue using the lens case.
DIY USB Cables
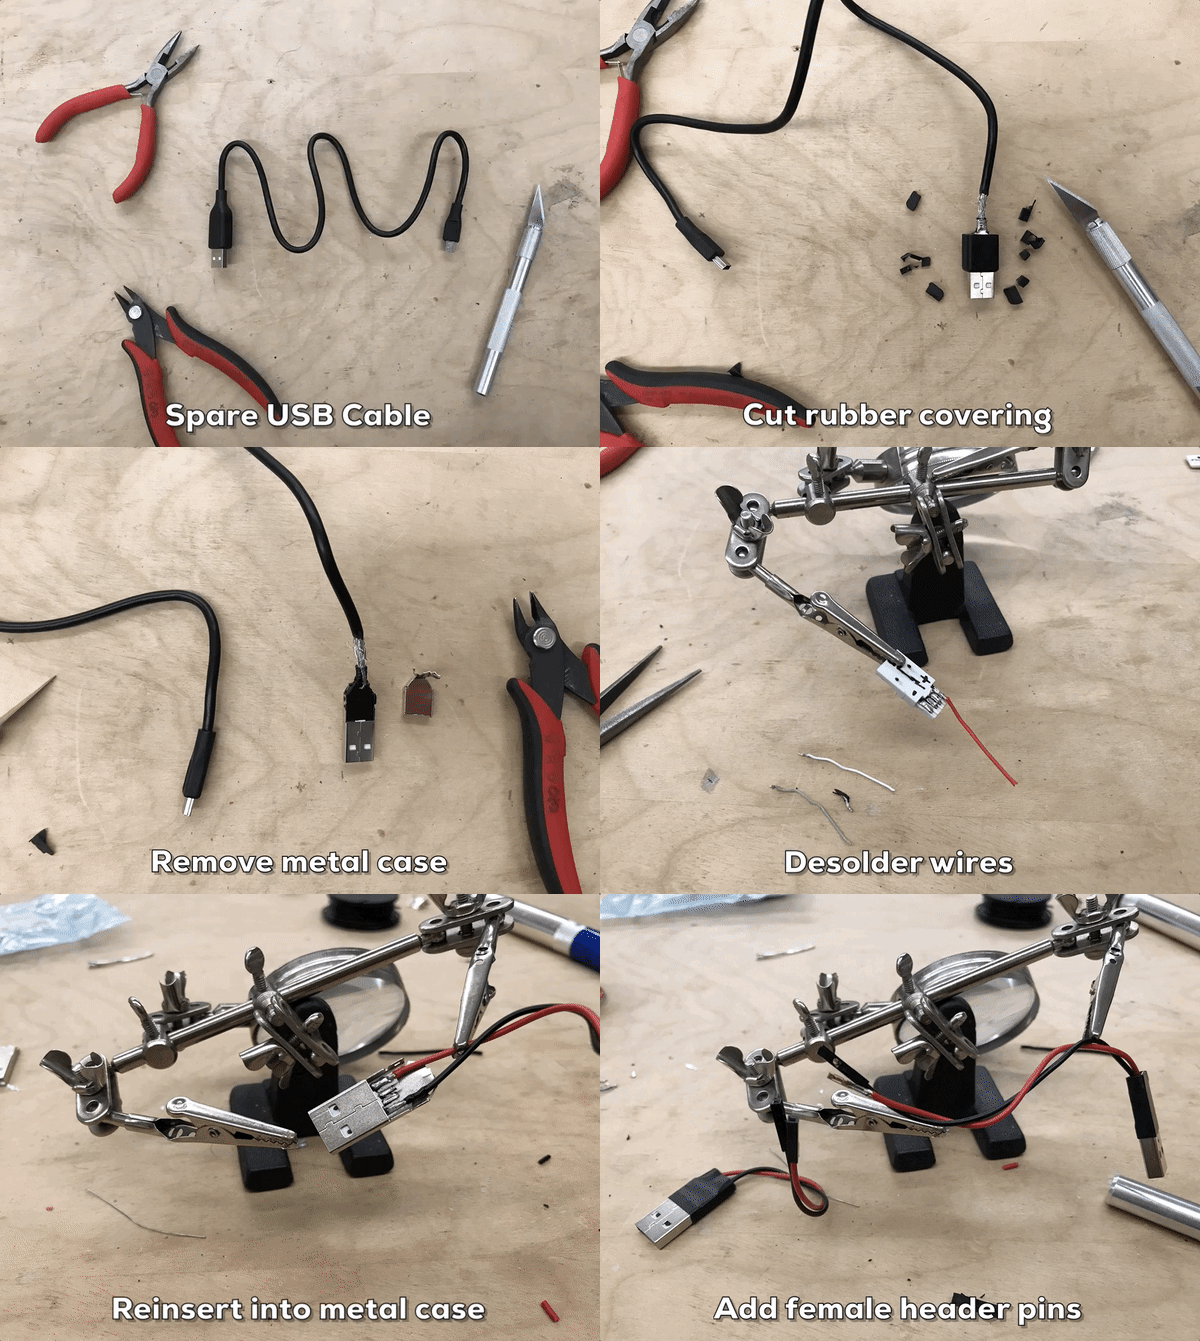
I purchased 6-inch micro USB cables to use within the camera. However since the cables were thick they were difficult to bend and were constantly pushing against components within the camera. They were also larger than what I required. I decided it would make more sense to create my own cables, specially since they were only being using for power transfer and no data transfer. This way I could use more flexible wire and cut them to the exact size I wanted. I stripped and used old USB cables I found lying around.
The Slow Reveal
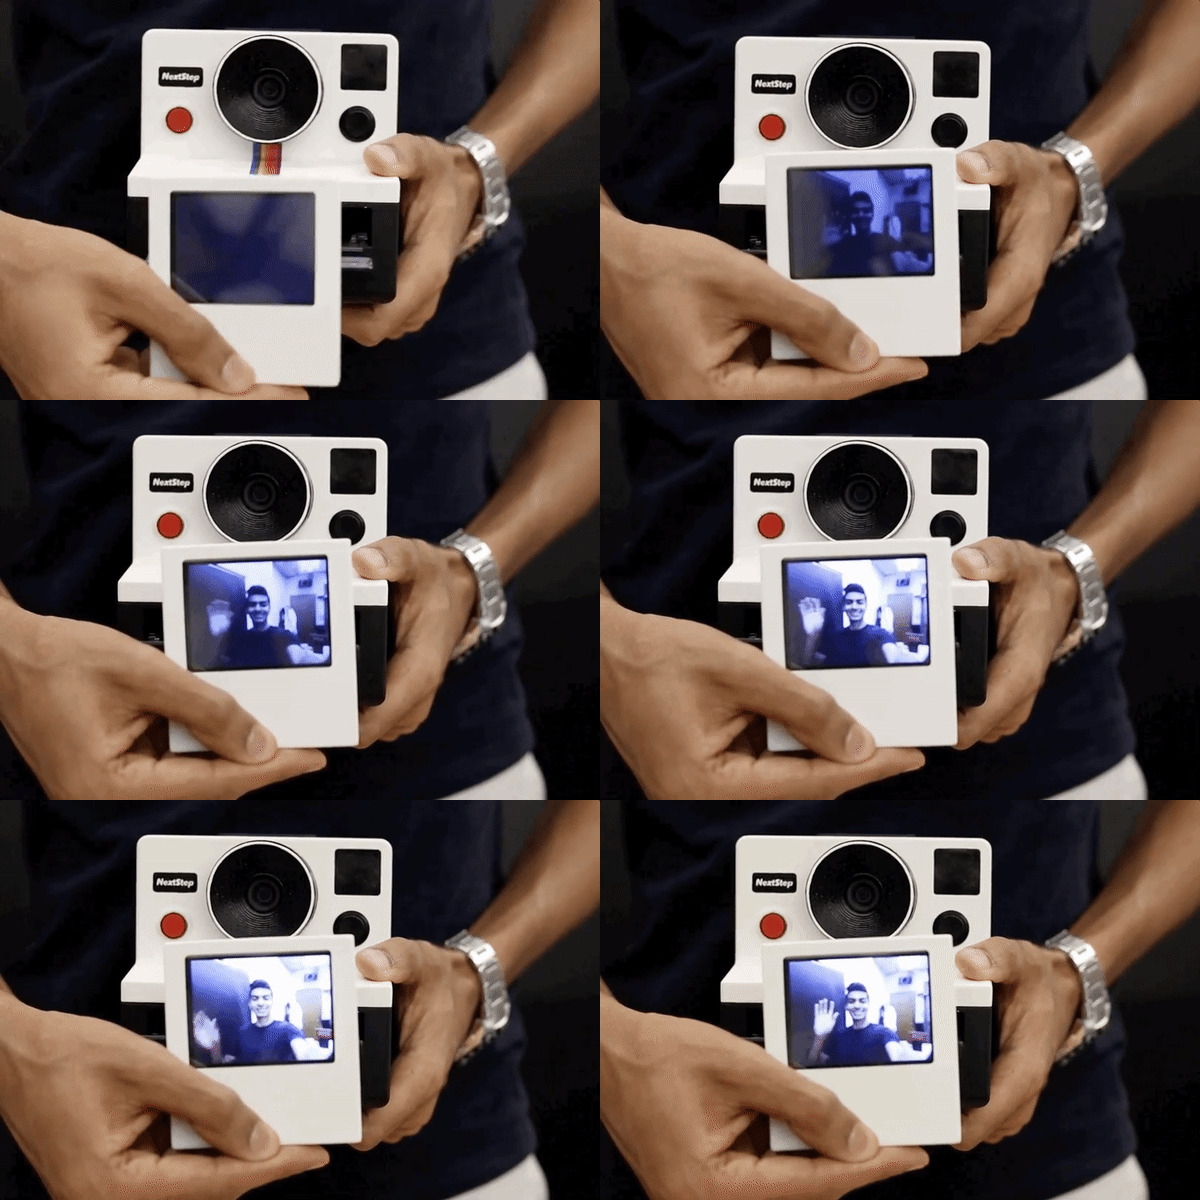
It's a Polaroid and I had to get it to fade in somehow! This took a lot of experimentation and trying a bunch of methods but eventually I settled on one of two methods:
1.) Progressively layer on the same gif with different and gradually increasing opacities.
2.) Get the camera to create a copy of the gif, except slow it down and programmatically add a fade-in from black.
Both these gifs would then be sent over -- the fade-in black version would be played first only once, immediately followed by the regular version on a loop. Method 1 is faster as it doesn't need to create and process a second file and then transfer two files over. Method 2 has a nicer effect. You can choose the method you want in the code.
Putting It All Together
Here's a fun time-lapse of the entire assembly process. It took quite long the first time round since I was making adjustments and refinements along the way to get everything to fit. I think otherwise it can be done in ~45 mins.
How Do You Use It?
Powering Up:
1) There's a hidden discreet button on the base of the camera which you click to power on the system. This is a actually the button of the power bank.
2) The cartridge needs to be powered on separately. There's a discreet button placed between the two copper plates.
Capturing a GIF:
1) Click the red button to take a picture. It snaps a 3 second GIF and the cartridge is ejected automatically when the picture is ready.
2) Reload the cartridge into the slot and press the black button to slide it back in.
Powering Down:
1) Long press the black button (>3 secs) to power off the camera and the cartridge.
About the Author(s)
You May Also Like
.jpg?width=300&auto=webp&quality=80&disable=upscale)
