Build an Arduino-based 4-Channel Data Logger
Wouldn't it be nice to have your own simple on-demand data logger for those occasions when you don't have connectivity? Here's how to build one using an Arduino Nano.
January 10, 2018

In many applications data collection is remote and Wi-Fi and Internet are not available.
In addition and in lieu of other backup opportunities, a simple on-demand logger would be a nice resource for custom applications that can accommodate the simple handshake protocol and have a serial output available to be saved into the removable SD card.
This project is an on-demand logger using an Arduino Nano-based controller. Like several similar SD serial loggers, the Arduino, used in this application is a popular choice for development and has the advantage that it creates this inexpensive data utility by exploiting the SD.lib, resident in the Arduino IDE.
This project differs from other modules because the logging feature uses a handshake protocol to support up to four external serial link requests. The configuration includes a real time clock (RTC) and supports a HC-05 Bluetooth (BT) module for clock setting and report monitoring. The code is taken and modified from the IDE library. Serial data, formatted with delimiters, will allow the filed logs to be downloaded directly into a spreadsheet as backup or for report generation.
PARTS LIST |
|
|
|
Qty. | Part |
1 | |
1 | |
1 | |
1 | |
1 | |
1 | HC-12 module (optional) |
2 | |
3 | |
3 | |
7 | |
2 | |
4 | |
14 | |
2 | |
2 | |
6 | |
1 | |
1 | |
2 | |
1 |
SCHEMATIC

The RTC was included to provide time tag and a the channel index is appended to the start of the saved data.
Because the logging data applications are external and on-demand, the serial source application may also include a “data taken” time tag in its saved transmission. Any serial link connected into the Arduino USB connector or the BT, thru any BT terminal application found your phone, can be used to set the clock using a simple key request sequence.
|
The finished Arduino Nano-based 4-Channel logger. |
Two LED indicators are also included to reflect recording activity, error, and availability and this implementation uses a simple, one-line handshake protocol, shown below.
The protocol is simple enough, but must be included in the senor/parameter source code. In ancient times, polling was a mainstay in processing architectures. The monitor products, taken from the serial sources, are polled (pinA7) in either a sequential or priority sequence. The polled “winner” is multiplexed and stored into an individually fixed named file, maintained on the SD card.
Serial data, formatted with delimiters, will allow the filed logs to be downloaded directly into a spreadsheet as backup or for report generation. Logging for applications that cannot support the polling sequence, where you may not have that kind of flexibility, should consider the well represented, single line, serial loggers units available on line.
The serial inputs are multiplexed into the controller. While there are more integrated offerings, I am using a transistor based mux implementation in this application. The transistor version does require more discrete parts, but, as shown, works well and was both quick with available parts and inexpensive.
Because the logging data applications are external and on-demand, the serial source application may also include a ‘data taken’ time tag in its saved transmission. Any serial link connected into the Arduino USB connector or the BT through most BT terminal applications found on your phone can be used to reset the clock and define the baud rates for each channel request information on the SD card.

Entering a ‘?’ displays the configuration/status menu.
Set Time
Function 1 displays a response, entering the RTC specifics. M:d:hr:min. Seconds are automatically set to 00, synced, when the enter is asserted.
You can set the clock using a simple key request sequence:

Change Channel Rates
Function 2 is entering in a single entry as 2$chan(1-4)$ rate$
eg; 2$2$115200$ sets channel 2 to 115.2K. (The code actually interprets the first 2 characters of the rate entry to derive a rate).
Display Channel Usage
The third function, provides a root directory of the channel files and their size

Two LED indicators are also included to reflect recording activity and availability.
The files names are fixed, in code, to be Chan1 through Chan4. If not found they are created for each of the four channels when data requests are sent.
Each log source initializes the request line to low and, when a logger is desired, floats the request line and waits for the logger to select it by pulling the line low. The source then forwards the data to be logged. The received data is appended to the source referenced SD card based named file. The string is also copied to the BT port as a monitor display.
The logger times out at the end of the transmission and re-floats/releases the request line.

The source must then return the request to low to identify the end of the sequence.
Here are my Arduino, C based scripts for inclusion into the data source:
const unsigned char LOGin1=14; //pin assigned as logger request
bool logr=1; // Boolean flag to enable log function
int i;
void setup()
{
Serial.begin(9600);
digitalWrite(LOGin1,LOW); // log req pin
pinMode(LOGin1, OUTPUT);
}
void Main()
{}
void req1() // is included to synchronize the serial source to the logger
{
if (logr>0 && digitalRead(LOGin1)==0)
{
pinMode(LOGin1,INPUT);
i=500; // wait up to 1 second
while (digitalRead(LOGin1)>0 && i>0)
{
i--;
delay(2);
}
if (i<1)
{ //no loggr response;
pinMode(LOGin1,OUTPUT);
}
else
{
report_set(); reference to specific code that assembles desired string to be recorded
i=125; // wait 0.25 seconds hold time to release
while(digitalRead(LOGin1)<1 && i>0)
{
i--;
delay(2);
}
if (i>0) // req is floating, logger released line
{
pinMode(LOGin1,OUTPUT); // this removes request to logger->0
}
}
}
}
//
void report_set() // example typical of log format
{
String dsp[2]={"T(f)delta "," H(%)delta "};
Serial.print(dsp[1]+String(arrayc[0]-lastT));
Serial.println(dsp[2]+String(arrayc[1]-lastH));
}
The source provides following the logger handshake and can be both, any data it desires logged and can be formatted uniquely for logging.

In my application, greenhouse parameters were collected and provided as shown in the figure. The same data was re-formatted, in the application and forwarded to the logger using an alternate string. The SD card is then read into my laptop directly into a spreadsheet. This format then uses space or comma delimiters to separate the column fields and lf/cr(\n\r) to delineate each of the logged sequences into the rows of the spreadsheet.
For the logger portion of the application, depending on some of the specifics of the design and in the packaging, the cost for a 4 channel, 8GB logger, BT and RTC modules, (‘including’ the SD card), comes in at about the $15-20 range.

Optionally, a HC-12 serial link can be added or substituted for the HC-05 Bluetooth module. The schematic identifies this substitution simply by the inserting the HC12 module into the appropriate header. The HC12 is a 100 channel, 433MHz based transceiver offering up to 1000 meters of range. The transistor buffer driver is still required in either case but may be deleted if neither wireless resource is configured in the application. The Arduino Nano includes the serial USB connector as a fallback monitor, if required. A ProMini could also used.
There are of course several variables that also should be considered for each unique application. Packaging, particularly for rain and battery access, is important, but other considerations may include data security, particularly in wireless applications and using opti-couplers to mitigate ground differences to remotely located serial logging sources. I have included two lines configured with opti-coulpers, on the schematic as an example. All these issues are dependent on your specifics of project and purpose.
Power to the logger application is 5 V and current should peak at about 250 mA. This is primarily a consequence of the transceiver power that may be configured as part of the project. Transmissions can consume that much current although the transmission durations are relatively small. Solar based power can then be considered, as an option, for logger application. High efficiency upconvertors (3.5 V to 5 V) or down convertor (9-18 V to 5 V) are also an option.
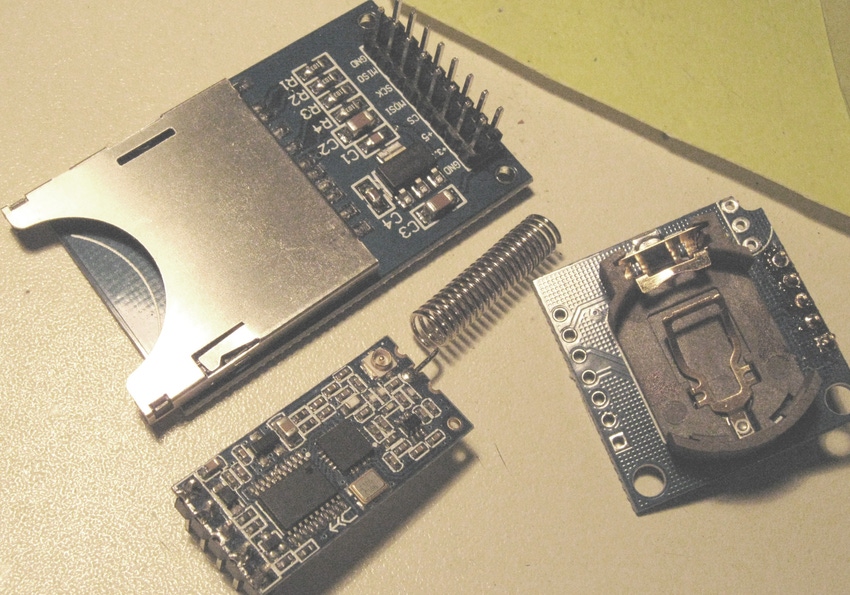
On the development assembly, the SD card carrier was mounted on the back. The RTC is also located on the back and the BT and HC12 modules mounted on top, vertically off the top of the board.
William Grill can be contacted at: [email protected]
[All images courtesy: William Grill]
About the Author(s)
You May Also Like

.jpg?width=300&auto=webp&quality=80&disable=upscale)


