A preview of the upcoming Design News CEC webinar course “Prototyping Home Automation Concepts," which will explore market trends and smart devices along with building experimental prototypes.
December 5, 2016
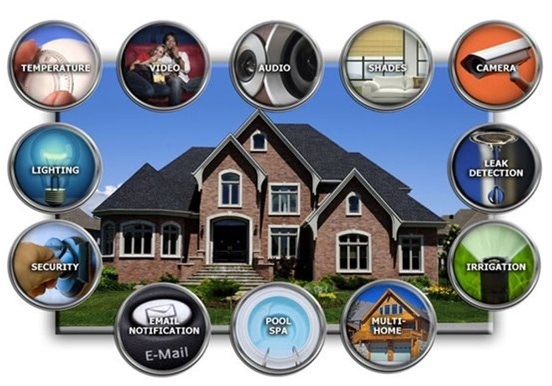
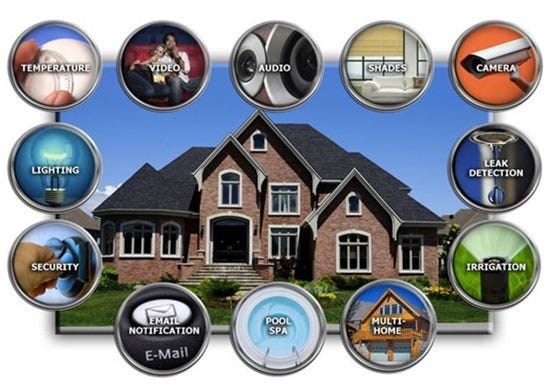
The home automation market continues to grow tremendously. According to a 2015 report published by IControl, a family house could have 500 smart devices in the year 2022. In a 2016 report, MarketsandMarkets projected the home automation systems market could reach $78.27 billion by 2022. Ordinary household equipment and appliances are being transformed into smart wirelessly devices using sensors and microcontrollers. Smart Devices include but not limited to thermostats, lights, wall outlets, cameras, and locks. My December 2016 Design News CEC webinar course “Prototyping Home Automation Concepts” will explore market trends and smart devices along with building experimental prototypes. Here’s a peek into the week-long webinar course:
|
(Image courtesy of Home Automation: Mark Moz) |
Course Overview
Course participants will explore the inner workings of smart home technologies through hands-on prototyping and experimentation of home automation concepts. The Raspberry Pi and the Grove Pi+ kit will be the main development platforms used in prototyping home automation concepts for security alarms, digital door locks, temperature-humidity monitoring, and small electric appliance controls. Also, Velocio ACE PLC and littleBits electronics will provide additional resource materials to be used in prototyping home automation concepts as well. The hands-on labs discussed in the webinar will require the following materials:
Raspberry Pi 2 or 3
Grove Pi+ Starter Kit
Velocio ACE PLC
littleBits SmartHome kit
littleBits Hardware Development kit
Velocio 5A Relay Terminal Block
Velocio Simulator Stick
Solderless breadboard
Jumper wires
The course will cover the following topics:
Day 1: Home Automation Basics, Example Systems/Devices, Project: Button and Buzzer-Grove Pi+ Introduction
Day 2: Home Security Basics, Example Systems/Devices, Project: Ultrasonic Detection and Alarm Device
Day 3: Home Temperature and Humidity Monitoring, Project: Temperature-Humidity Monitoring Unit
Day 4: Introduction to littleBits eModules, Smart Home Kit, Project: Coffee Control Unit
Day 5: PLCs and Home Automation, Project: Programmable Timer for Small Appliances
Included with each session are setup procedures to build the prototypes discussed in the hands-on lab section of the presentation.
Prototyping a Temperature – Humidity Monitoring Device
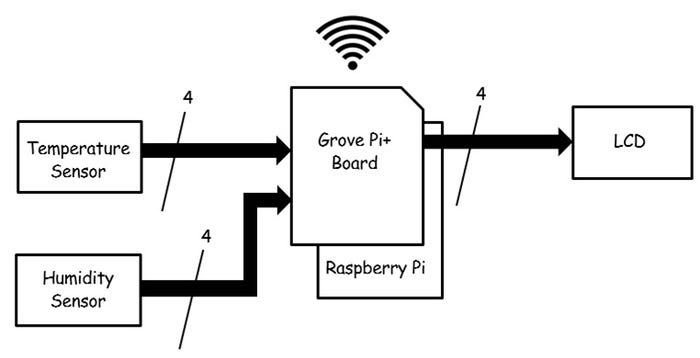
One of the key enabler technologies used in smart wireless devices are radio chipsets for mobile connectivity. There are variety of proprietary radio chipsets as well as traditional electronic communications standards being used in smart wireless devices for home automation systems. The defacto IEEE 802.11 network standard allows instant connectivity between household devices. In the Day 2 session, participants will be building a temperature-humidity monitoring device. The Raspberry Pi, Grove Pi+ shield, a temperature-humidity sensor, and an I2C LCD are the main components for the monitoring device project.
|
The Temperature-Humidity Monitoring Device System Block Diagram. To build the wireless monitoring device requires only five basic components. (Image source: Don Wilcher). |
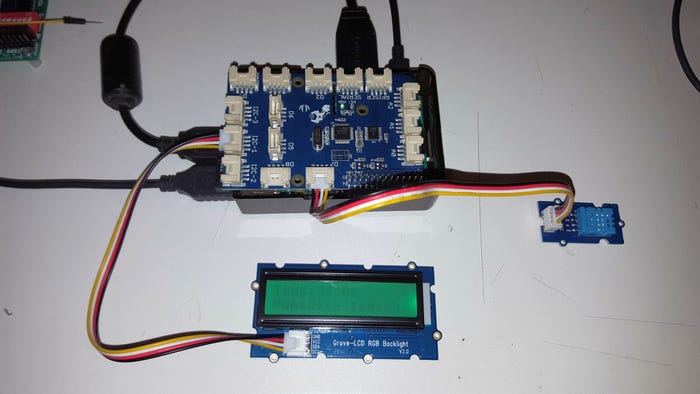
The temperature-humidity sensor and LCD components connect to the Grove Pi+ shield using jumper wires. A WiFi dongle is required for Raspberry Pi B, B+, and Pi2 computers. The dongle easily plugs into an available Raspberry Pi USB connector. A software application packaged with the Pi’s Linux distro needs configuration to connect to the home WiFi network.
|
The Grove Pi+ shield and Python program allows for a wireless temperature-monitoring device to be built with a Raspberry Pi. (Image source: Don Wilcher). |
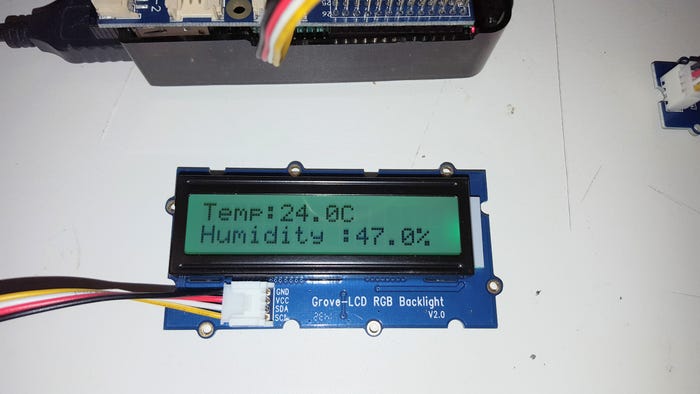
The Python software programmed into the Raspberry Pi allows the sensors to read an environment’s temperature and humidity levels and display them on an LCD. The data can also be viewed on an HDMI monitor as well.
|
An I2C LCD easily displays temperature and humidity levels. (Image source: Don Wilcher). |
Wireless Connectivity
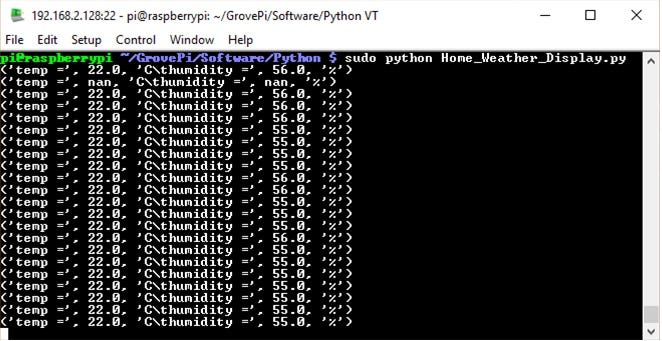
A simple technique of displaying data between wireless devices will be presented in the webinar session. Secure Shell or SSH connection allows the temperature-humidity data to be displayed on a notebook, desktop computer, or mobile device screen. This feature allows the monitoring device to be located in remote locations while viewing temperature and humidity data using a WiFi network on a computer screen. A communication terminal program like Tera Terminal or Putty is used to wirelessly connect the monitoring device to a notebook or desktop computer.
|
Temperature and humidity data from a Raspberry Pi being displayed on a notebook computer using Tera Terminal software. (Image source: Don Wilcher) |
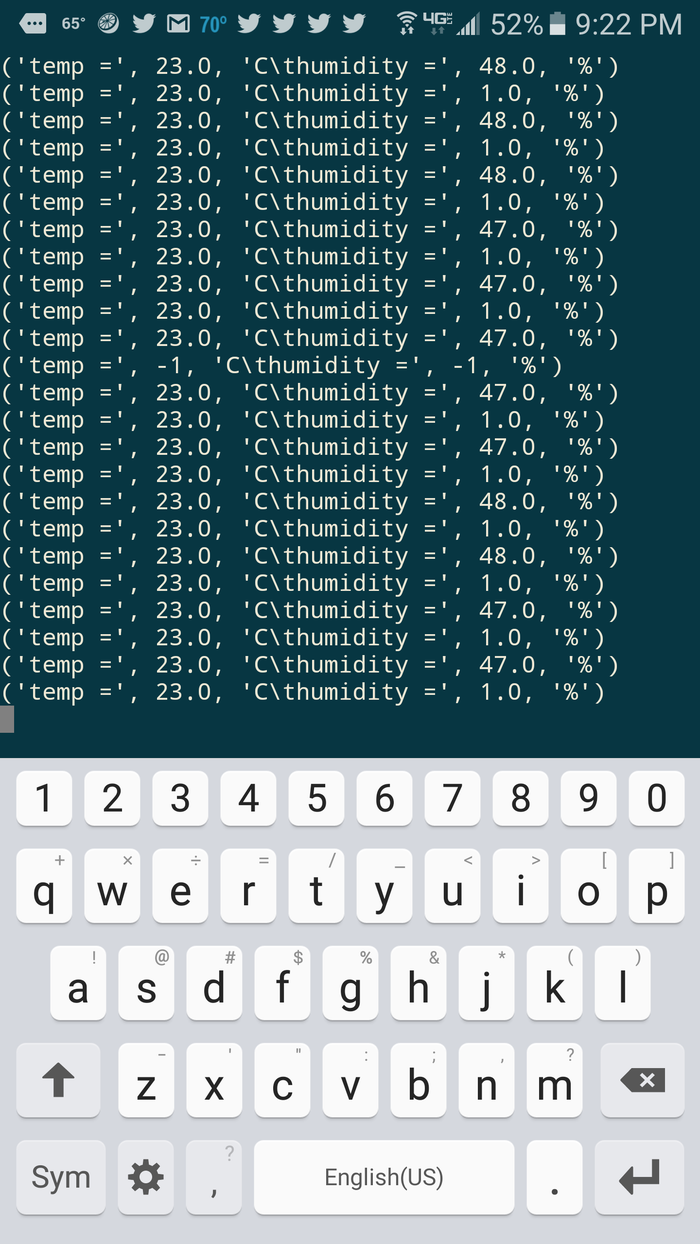
Also, environmental data can easily be displayed on a smartphone or tablet using an equivalent communication terminal applet. For an android tablet or smartphone, “Juice” allows a SSH connection to be made between the Raspberry Pi and the android mobile device.
|
A smartphone can easily display temperature-humidity data using an Android mobile communication terminal app Juice. (Image source: Don Wilcher) |
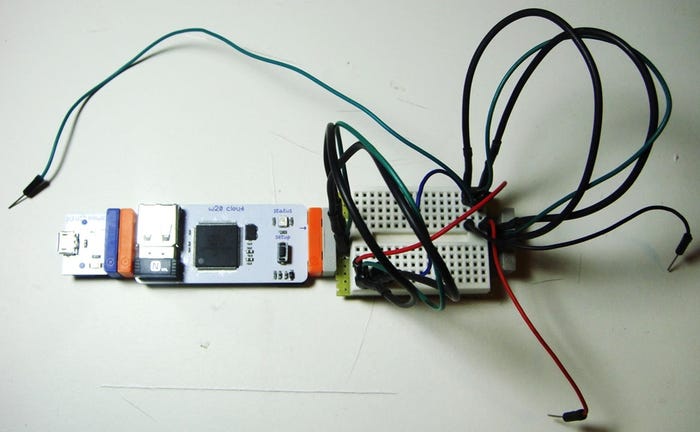
In addition, the littleBits cloud bit will be discussed as an alternative WiFi connecting device for prototyping home automation devices. The cloud bit requires no software configuration to connect to the home’s WiFi network and provides a variety of consumer appliances to be control easily using a mobile device.
|
The littleBits cloudbit provides an alternative WiFi access point for prototyping home automation devices. Details of the cloudbit will be provided in the webinar session. (Image source: Don Wilcher) |
The course is scheduled for the week of December 12. Check the Design News CEC webinar calendar for parts obtainment and registration information.
Don is a passionate teacher of electronics technology and an electrical engineer with 26 years of industrial experience. He has worked on industrial robotics systems, automotive electronic modules and systems, and embedded wireless controls for small consumer appliances. He's currently developing 21st century educational products focusing on the Internet of Things for makers, engineers, technicians, and educators. He is also a Certified Electronics Technician with ETA International and a book author.
About the Author(s)
You May Also Like

