November 7, 2016

The Attack Dyno is a convenient and affordable way to bring an attack timer and dynamometer right to the comfort of your own vehicle. The whole design is built to fit right into the space of a standard do-it-yourself aftermarket car stereo. With the convenience of concealment and very little user input, the Attack Dyno will calculate many more things than your standard dynamometer or attack timer will. The design of the Attack Dyno is catered to the curious side of any car enthusiasts. With the ability to output vehicle torque, speed, horsepower, 1/4 mile times, 0-60 mph acceleration times, ambient air temperature, and more, the Attack Dyno is perfect for those who want to experience and gain knowledge of their vehicle's full potential without breaking the bank.
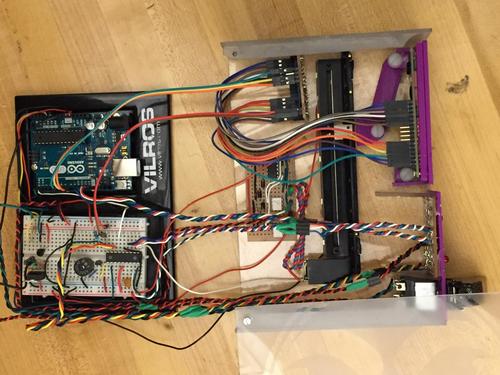
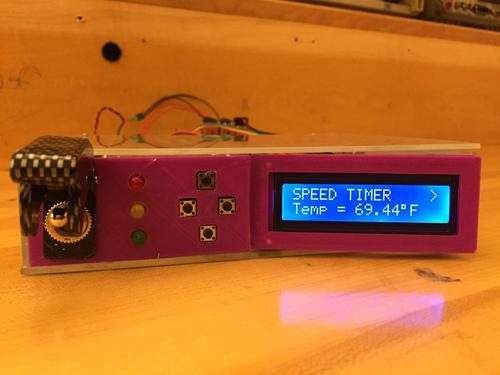
Figures 2 and 3 show a complete and thorough overview of the device. The Attack Dyno has a magnetic reed switch that the user needs to first mount to their vehicle. Comprised of two components, the reed switch is attached to the consumer’s wheel using simple double sided automotive tape. The reed switch is attached to the vehicle’s caliper while the corresponding magnet is attached to the actual wheel of the vehicle at no more than 0.5 inches apart.

Along with this, the vehicle’s wheel radius and curb weight are hard coded into the Attack Dyno program and can be changed. Once these two things are complete, the Attack Dyno is ready to be used. Using the buttons shown in Figure 3, the user will navigate through the user interface to the correct program that he or she wants to use.

A two pitch launch timer, accompanied by three blinking LED lights cycling through red, yellow, and green, will let the user know when the Dyno will start running and in turn when to step on the gas. As the vehicle is moving, the reed switch attached to the wheel will input data to an Arduino microcontroller, which will in turn perform the needed calculations and display the final values for the user onto the LCD screen.
Download the full build instructions here.
Want to submit your own project to Gadget Freak? Email us! Be sure to include "Gadget Freak" in the subject line.
Allied Parts List |
|
|
Amt | Part Description | Allied Part # |
5 | 10 kΩ Resistor | |
1 | 1kΩ Resistor | |
7 | 330Ω Resistor | |
1 | 3 kΩ Resistor | |
4 | Momentary Switch | |
1 | Piezo Speaker | |
4 | Diode | |
1 | SWITCH-DPDT | |
1 | LED - Red | |
1 | LED - Yellow | |
1 | LEDs - Green | |
1 | L293D | |
1 | LCD screen | |
1 | Arduino Uno (Rev3) | |
1 | PIC16F88-DIP | |
2 | NPN-Transistor | |
1 | Reed switch | |
1 | 74HC595 | |
1 | SLIDER | |
1 | Optocoupler | |
1 | Voltage Regulator | |
3 | 9V connectors |

We're heading to Philly! Design & Manufacturing Philadelphia will take place Oct. 7-8. Get up close with the latest design and manufacturing technologies, meet qualified suppliers for your applications, and expand your network. Learn from experts at educational conferences and specialty events. Register today and join us at Philadelphia's premier industry showcase!
About the Author(s)
You May Also Like


