Bringing Back a Classic Tube Radio as a Bluetooth Speaker
Simulating the full tube-radio experience with Bluetooth, an ESP32, and Arduino software.
November 28, 2023
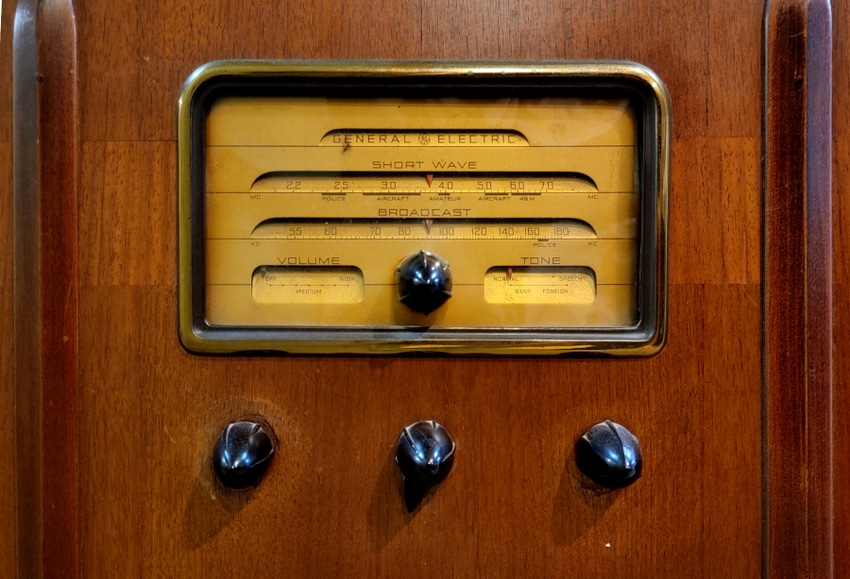
With each passing year, more old radios succumb to “passive” death. The tubes may still be working, but paper capacitors dry out and crack open. Electrolytics gum up and short. Carbon resistors and line-voltage wire insulation may also decay over decades of heating and cooling cycles. Radio restoration experts will tell you to not even think about powering up a 50-or-more-year-old radio without some serious under-the-hood inspection and work. That work usually involves replacing all of the failed passive components and much of the insulated wiring.
“Grandpa’s old radio”—a 1935 console GE model F-65, six-tube superheterodyne AM broadcast and shortwave receiver—has held up remarkably well since it came off the showroom floor three score and ten years ago. The wooden cabinet, control knobs, speaker cloth, and faceplate are all intact. The only outward signs of wear are a few scratches here and there and a burn spot where someone set and forgot a still-lit cigar.
It is a work of art from a bygone era and deserves a better fate than as a dust-collecting “junk shelf,” or even worse—to end up in a landfill. That was, in fact, the fate from which I rescued this beauty. On the way out the door of an estate sale, the sale operators said: “We’re closing up here. $20.00 and it’s yours. Otherwise it goes to the dump.”
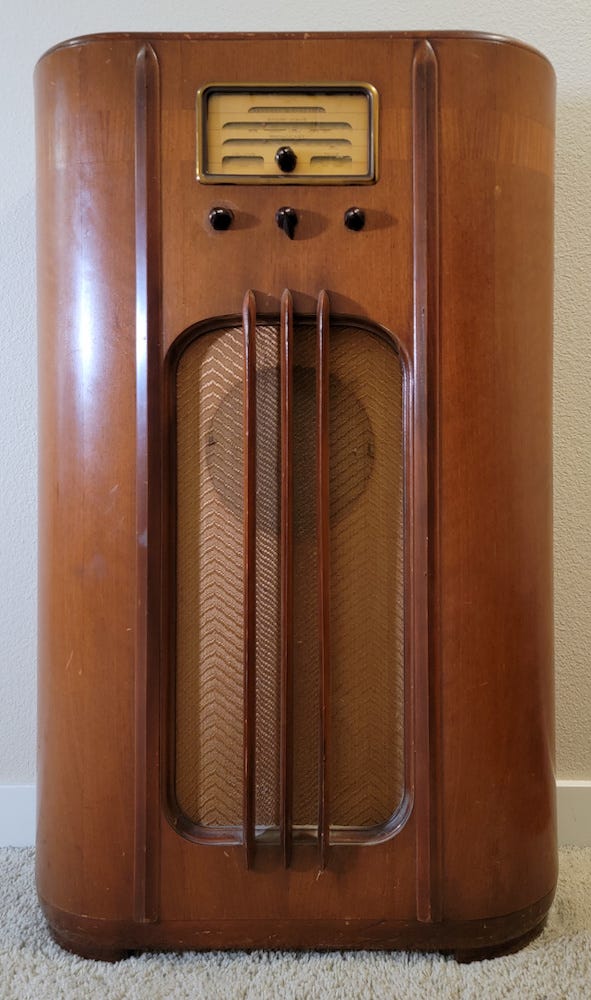
1937 GE model F-65 Console AM/Shortwave tube radio. DUANE BENSON
Assessing the “Damage”
While everything looked good from the outside front, the inside told a different story, though I have seen worse. All of the tubes were present and the chassis labels were still readable. However, the AC power cord had dried out and cracked to the point of being nothing more than a fire starter. Someone had pulled the metal multi-value canister electrolytic capacitor (seen in the photo below, lying on its side behind the chassis), and there were a number of wires to nowhere.
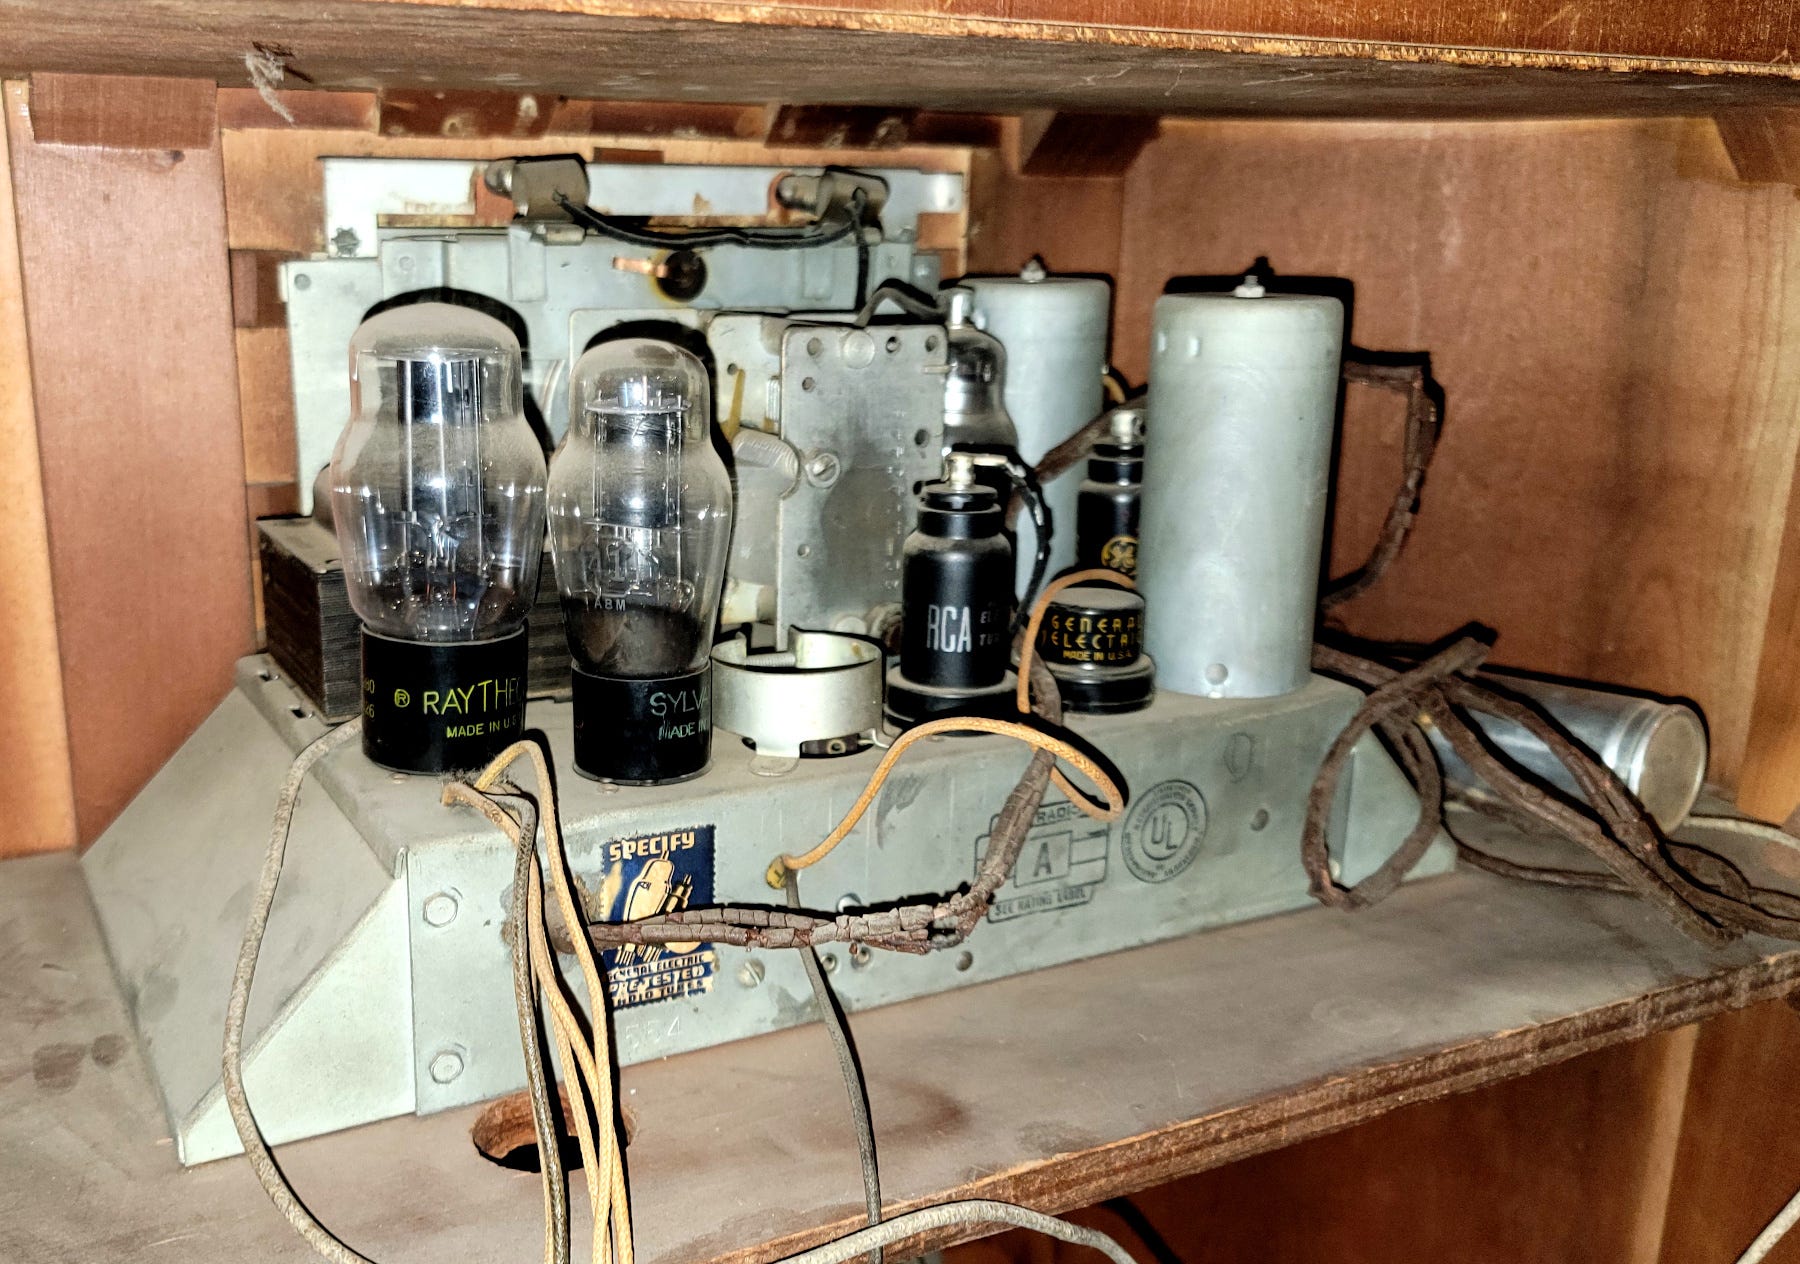
A largely intact radio chassis, but clearly needing some work. DUANE BENSON
Under the chassis, the radio looks very restorable, but nothing close to useable at the moment. Restoration would involve replacing all of the paper and electrolytic capacitors, testing and replacing the resistors as needed, and removing and replacing dried out electrical tape and wires with failing insulation.
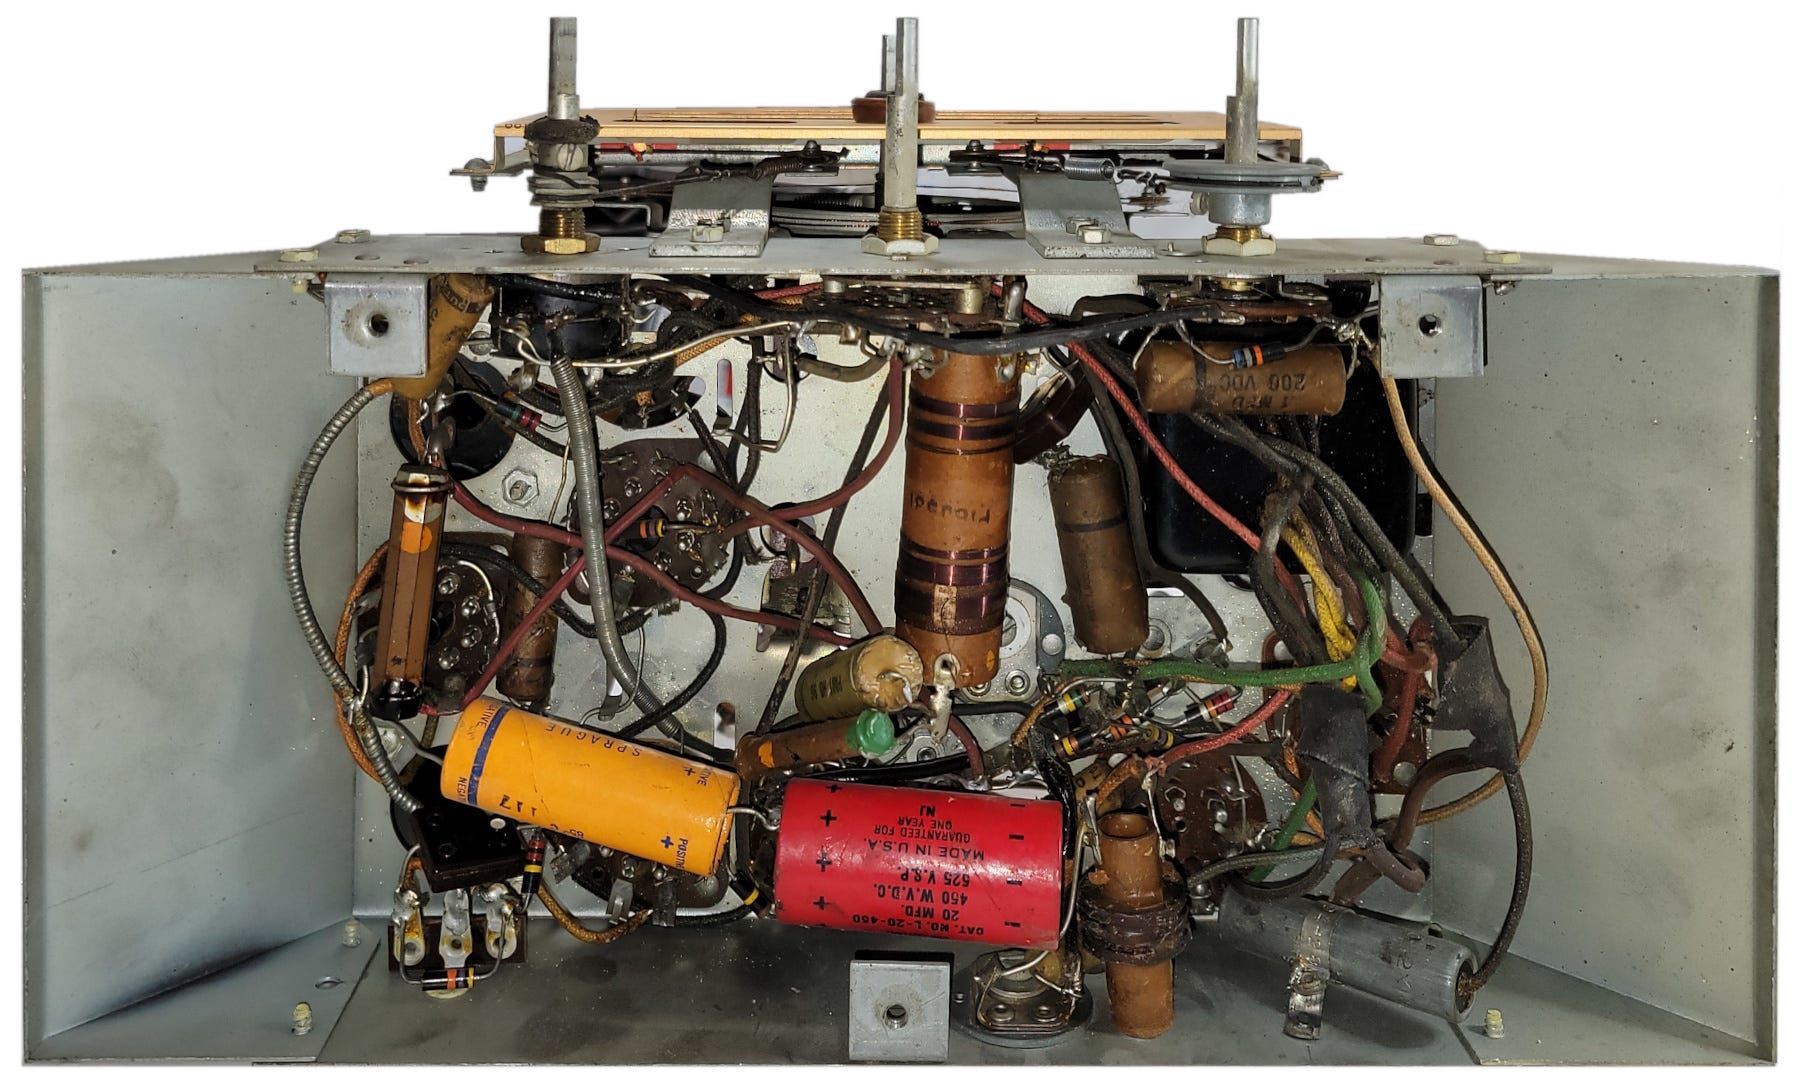
85-year-old point-to-point wiring. DUANE BENSON
I believe the bright-orange-and-red cardboard-covered Sprague electrolytic capacitors were soldered in to replace the multi-value electrolytic seen in the prior picture. That makes the canister only cosmetic, but I would guess that the repair was made in the 1960s or ‘70s, based on the style of the components. If you look carefully on the red 20 MFD 450 V capacitor, you can read: “guaranteed for one year.”
Bringing It Back to Life
I thought (briefly) that there might be a market for a commercial AM station that played analog music to cater to the old radio collectors. More practical though would be a small (FCC Part 15) legal-without-license home AM transmitter that hobbyists could buy or build. The transmitter would have a Bluetooth front end and would re-transmit music as an AM signal throughout the house. However, decent quality AM transmitters, even in the milliwatt power range, are dreadfully complex, and I would still need to restore the radio set.
A much easier route would be to toss an Amazon Alexa, Google Home, or generic Bluetooth speaker inside the radio. However, in my opinion, that would miss the point of an old radio and would not do justice to the history of the unit. It’s not a tube radio without the warm up period and orange glow from the tube filaments.
Simulating the Tube Radio Experience
Bluetooth devices are inexpensive and easy to find. However, microcontrollers with Bluetooth audio are a bit of a different story. This ended up leading me down several dead ends. Many mid-range MCUs do support Bluetooth LE, but not traditional audio. LE is for data only. I wrote most of the software in Python for an ESP32 that, as it turns out, only supports BT LE.
After paying more attention the second time and waiting a few weeks for delivery, I settled on the ESP32-PICO-Kit D4 module. I chose RGBW NeoPixels to simulate the tube and pilot lamp filaments. Beyond that, I added an I2S digital amplifier and a lithium battery charger. The only discreet components needed were the individual NeoPixels and a 10K pullup resistor.
Here’s the parts list:
Espressif ESP32-PICO-Kit D4 (Using Arduino IDE)
Adafruit MAX98357A I2S Class-D amplifier
Five Adafruit RGBW NeoPixels
LiPoly power supply/charger (my design)
LiPoly battery
USB wall-mount power supply
Any 8- or 4-ohm speaker capable of 4 Watts or more
Bluetooth Arduino libraries from: Tierneytim - https://github.com/tierneytim/btAudio
This radio has two pilot lamps and three glass tubes. The other three tubes were probably originally glass, but as is are encased in metal so the filaments are not visible. I experimented with the NeoPixel RGBW values to settle on a bright white, with just a hint of yellow for the pilot lamps and a warm orange for the tube filaments.
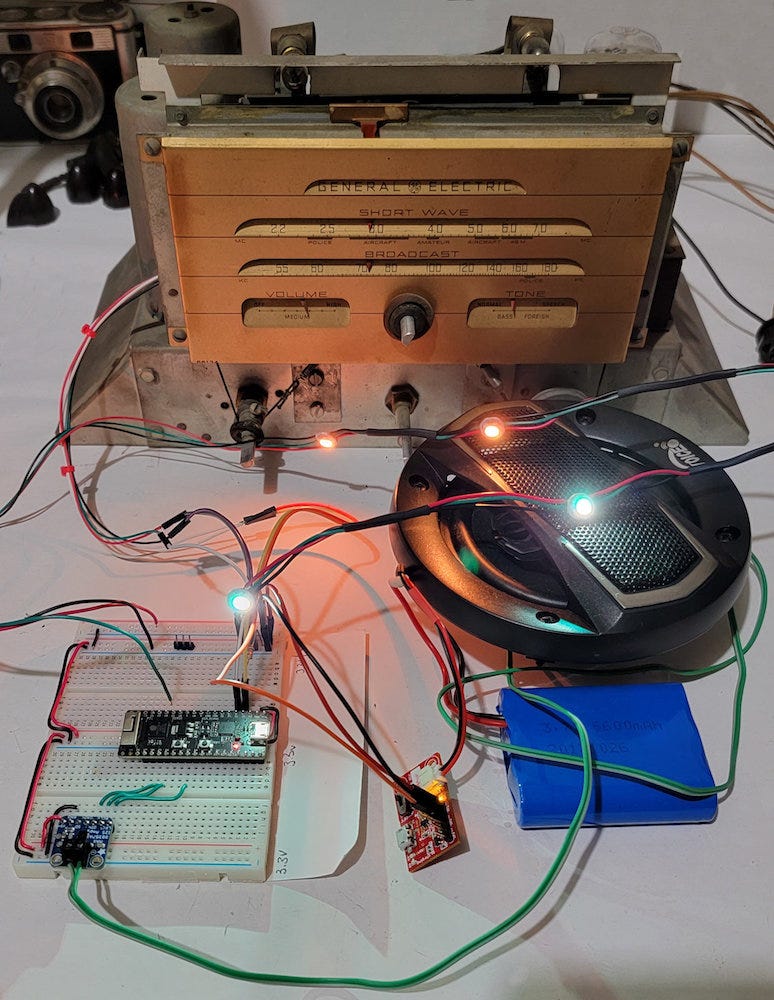
Prototyped tube radio simulator. DUANE BENSON
I want this to operate like an old radio, so I used the original switched potentiometer from the radio for on/off and volume. That led to the only modifications I made to the original radio electronics. I desoldered the switch and potentiometer and reconnected it to my own wires.
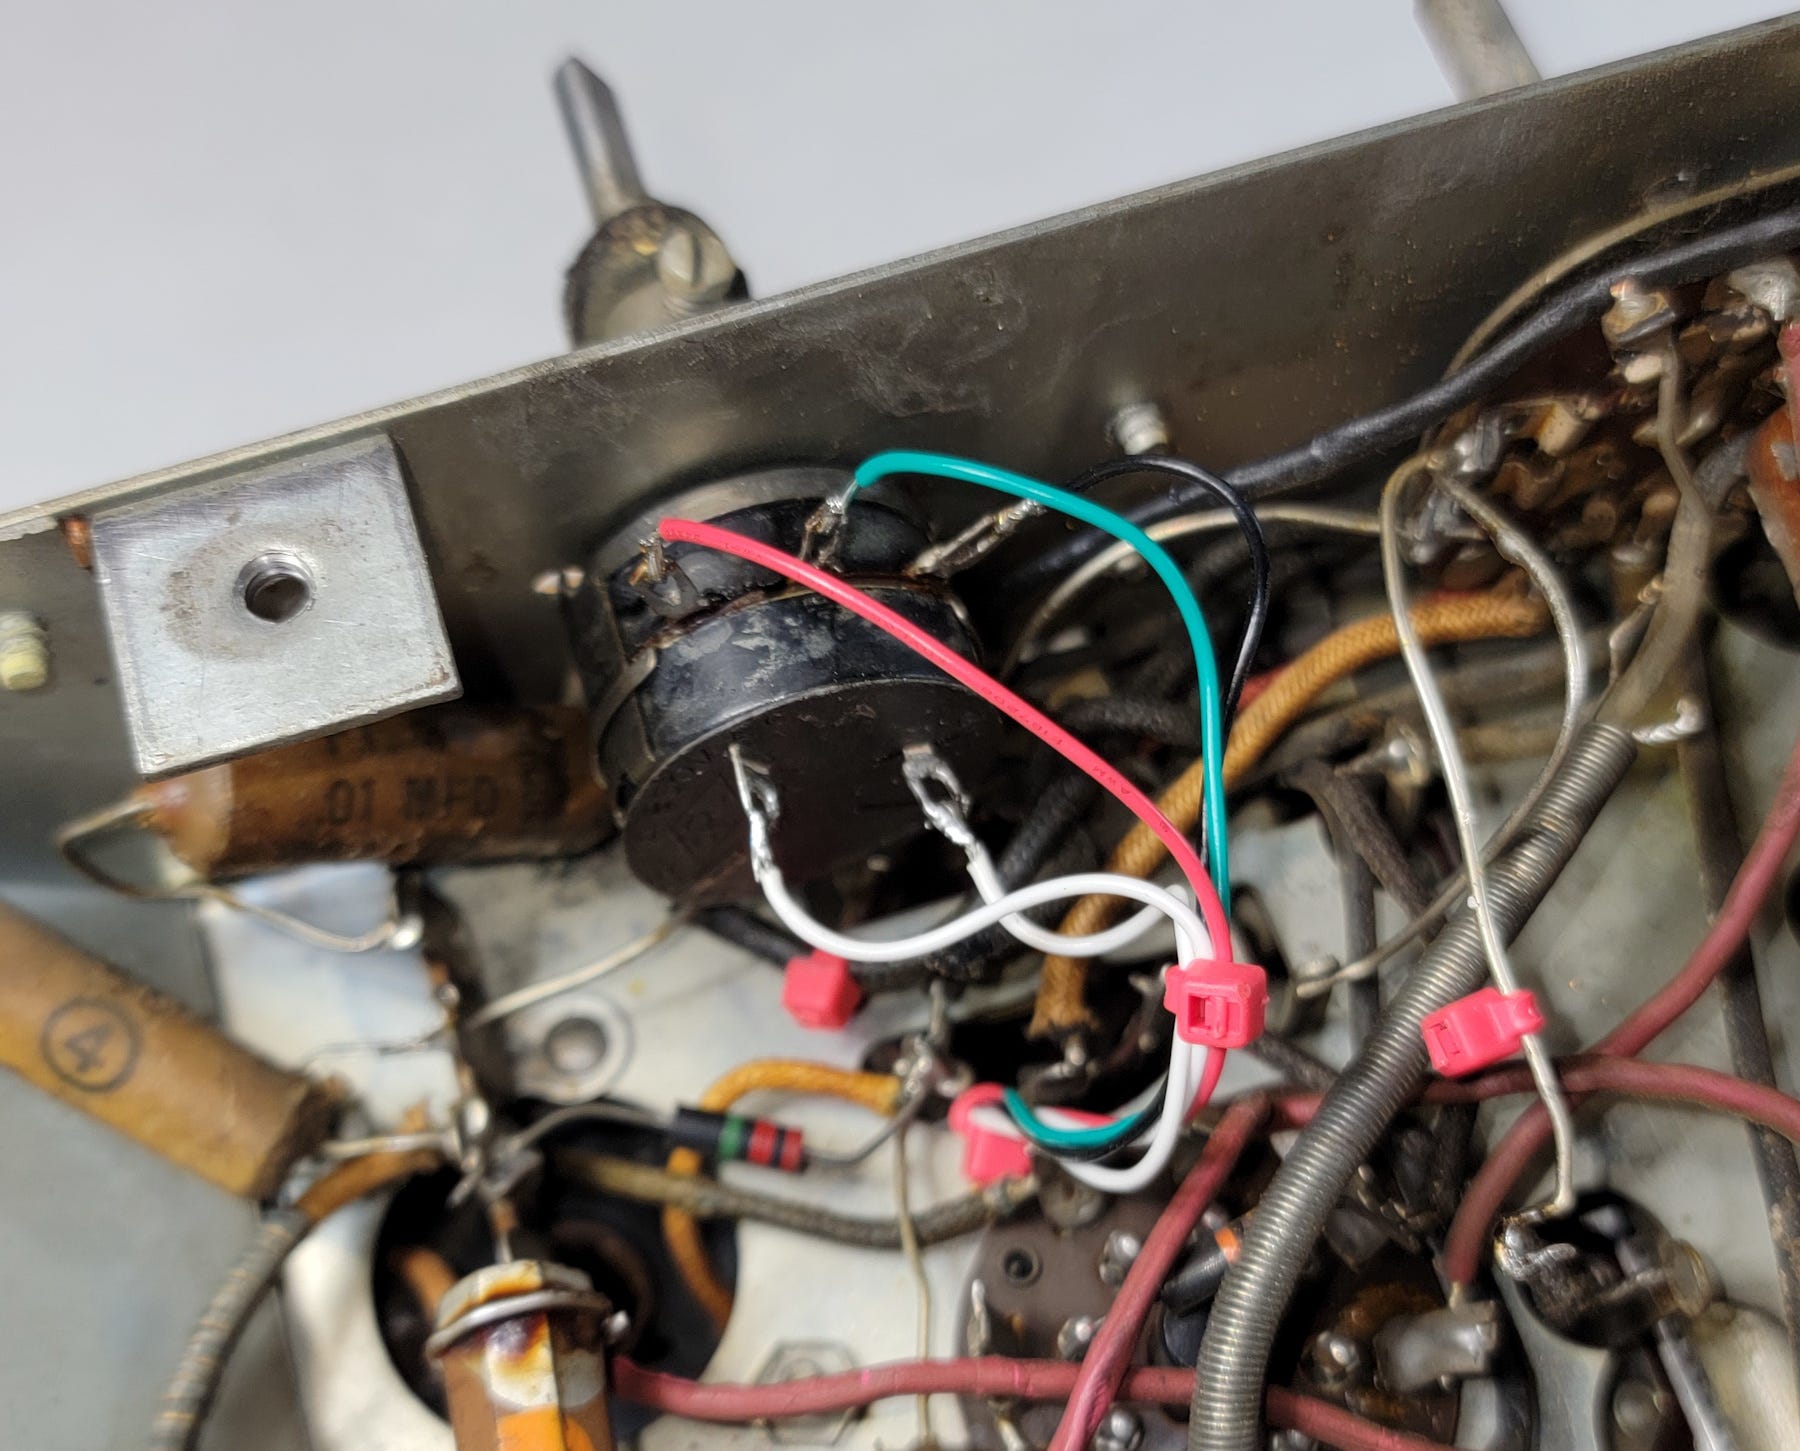
Using the original on/off switch and volume control. DUANE BENSON
The switch feeds to the ESP32 GPIO pin 37 and ground. Pin 37 has a 10K pull-up resistor to +3.3 V. The center pin/swiper of the potentiometer connects to analog in, pin 38 of the ESP32, and the two outside pot pins go to +3.3 V and ground. If you duplicate this and find that you are at full volume when you should be at minimum, simply swap the pot power and ground.
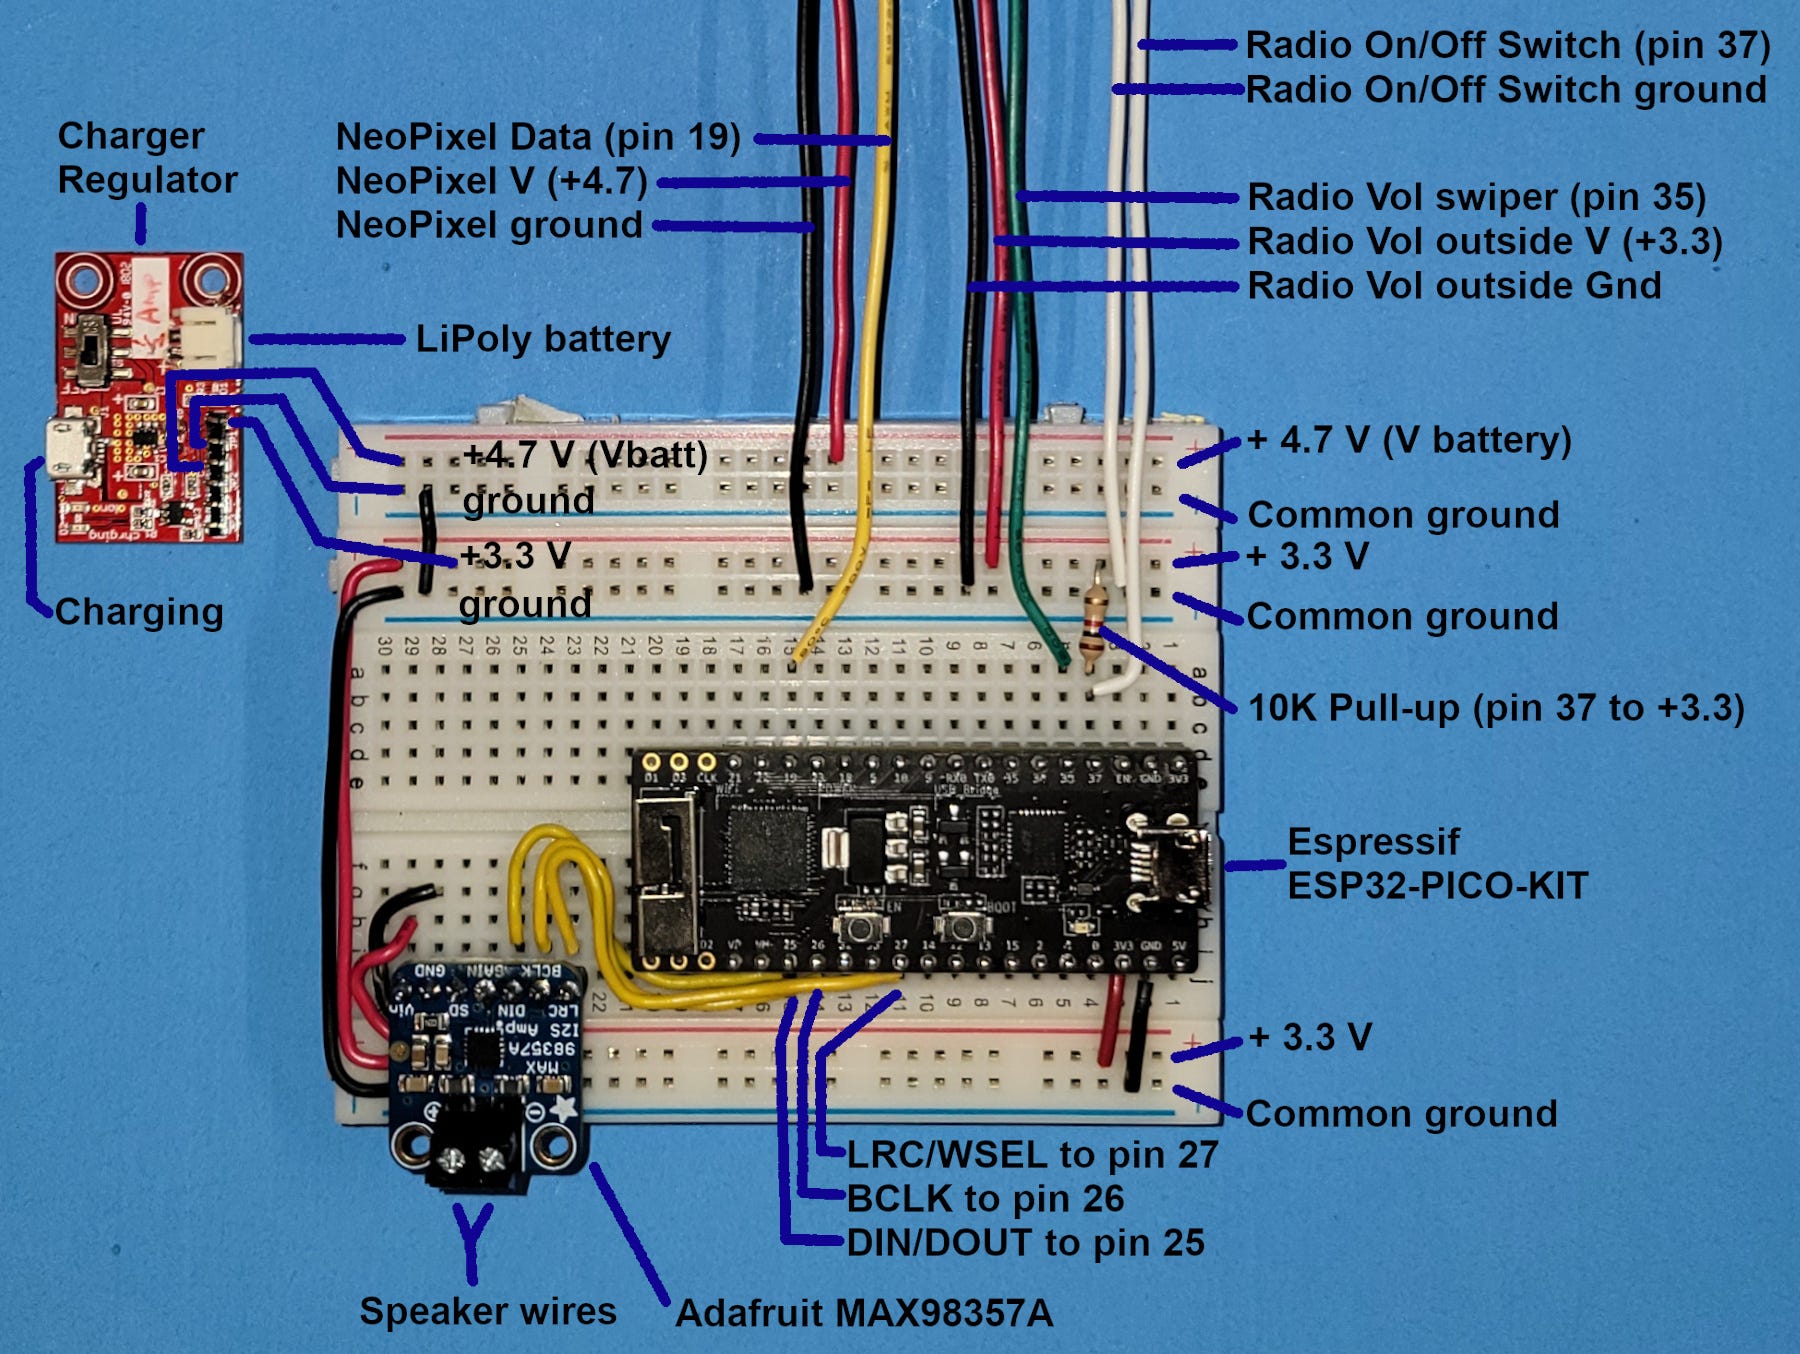
Connection diagram for tube radio simulator electronics. DUANE BENSON
The NeoPixel data line connects to pin 19, and their power connects to ground and the LiPoly battery voltage line (about 4.7 V). The ESP32 board can power the NeoPixels with its 3.3 V regulator, but the pixels are designed for higher voltage and can draw up to 20 mA each. I’m using a LiPoly charger/regulator board of my own design, and it has both regulated 3.3 V and batter power outputs.
Device Operation
I don’t use the radio potentiometer as a true on/off switch. The device is always on in standby mode. When I “turn the radio on,” the switch closes and connects to ground. My code monitors the state of this switch, waiting for the LOW input, which initiates the power-on process. It then performs an analog read on the volume control line and starts the warm up sequence.
The Arduino system reads analog values as an integer between 0 and 4096. The Bluetooth audio object looks for a floating point value between 0 and 1, so I divide the analog input value by 4096 before sending it to the audio object to set the warmed up volume value.
First, you hear the mechanical “click” from the power/volume knob. Then I bring up the brightness of the two pilot lamps over a period of about half a second. Following that, I gradually brighten the tube filament NeoPixels over about 20 seconds. Halfway through that sequence, I gradually bring up the volume.
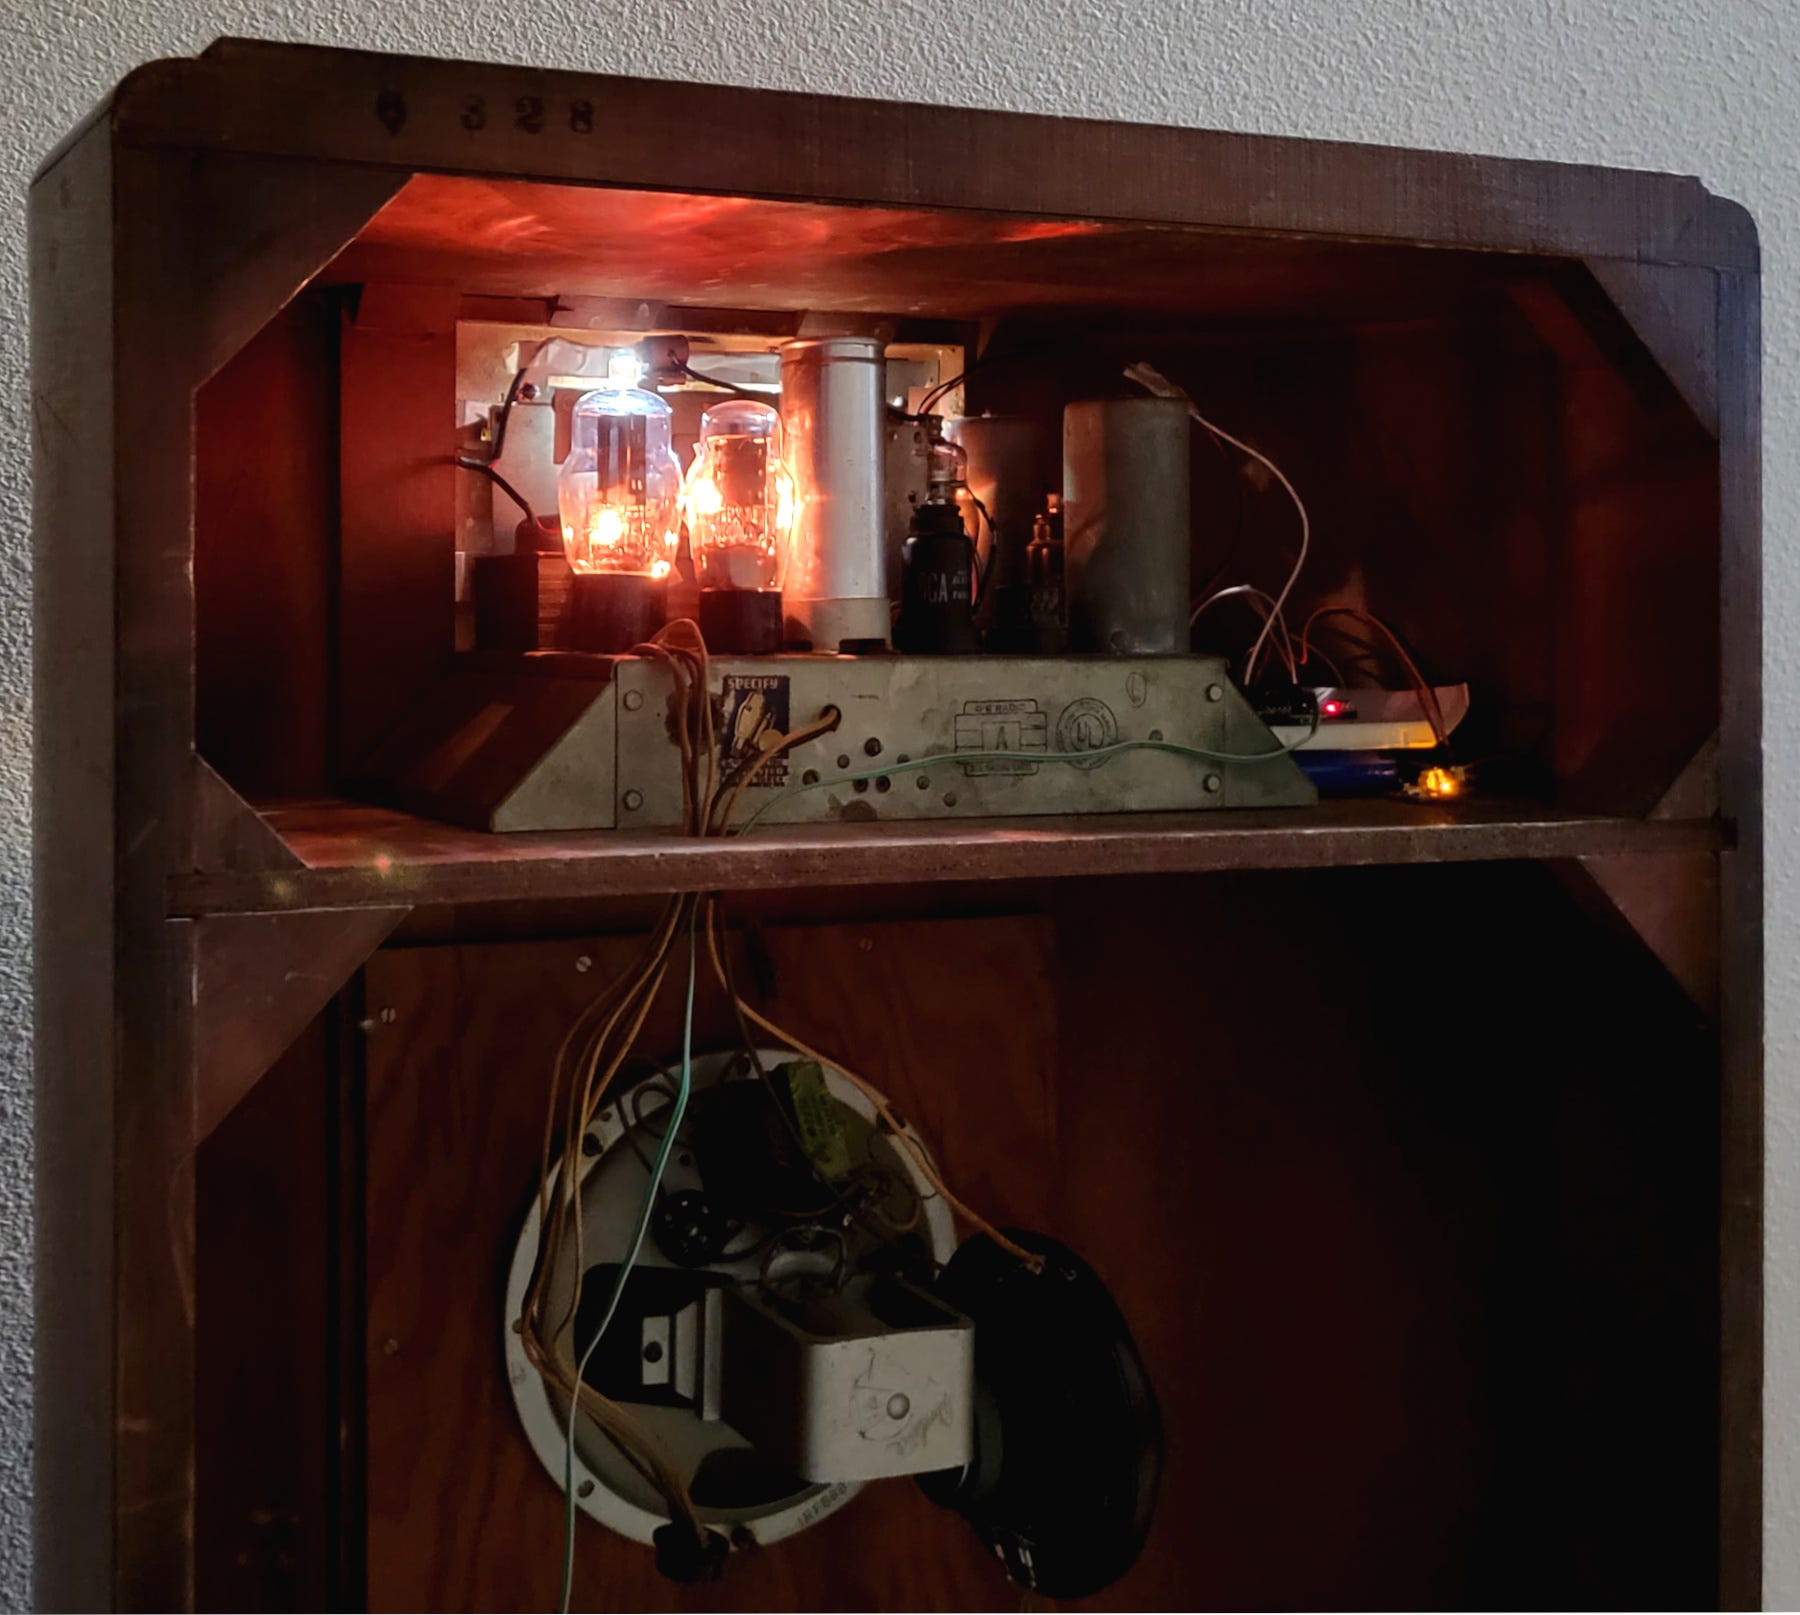
Radio fully on with tube filaments and pilot lamps on. DUANE BENSON
From then on, the system monitors and adjusts volume and will turn off sound and light when the radio power switch is turned off.
Bluetooth pairing of the device is quite simple. You don’t need to turn the tube radio power switch on, but your internal electronics power switch must be powered on. Use your phone, laptop, or other Bluetooth source to pair to “ESP_Speaker.” Then play Pandora, YouTube, or any other music source. Turn the radio switch on and drift back to a simpler time in the world of electronics.
Interested in Duplicating the Effort?
To follow in the footsteps of this article, you can download my code and parts list and the Bluetooth audio library from Github:
Future Plans for the Project
Space isn’t a problem in the back of these old radios, so I haven’t yet taken any steps to reduce the size of my additions. My next version, however, will be small enough to be unobtrusive. The BT antenna can’t be inside the metal chassis with the other electronics, so I’ll put everything on a small PCB inside a small wooden box. I want to find a more powerful I2S amplifier, maybe about 10 W.
I’ll also add a bit more sophistication to the code. Instead of just shutting off the NeoPixels and audio at power-off, I’ll drop both to zero over about two-seconds. The Bluetooth audio library has additional DSP functions that I’ll look at to improve audio quality. Finally, I’ll see what I can do to add the ability to change audio channels using some of the hard switches on the radio. Throughout all of this, I will leave the original electronics in place so that the radio is still restorable should I or someone else decide to do so.
About the Author(s)
You May Also Like
