RaspiRobot Board Rapidly Builds Robots and Visual Displays
July 23, 2015
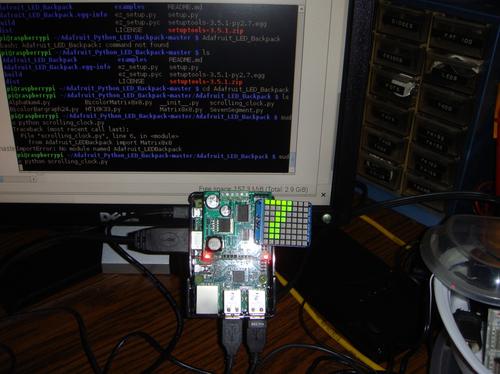
In my Design News Continuing Education Center web course, titled Building Raspberry Pi Controllers with Python, sponsored by Digi-Key, I introduced expansion board called the RaspiRobot Board (RRB). The RRB was designed and developed by prolific electronics DIY maker and book author Simon Monk to alleviate the task of building a specialized Raspberry Pi electronics controller for robotics and visual display applications. The RRB provides a wealth of onboard electronics I/O interfaces that can easily be programmed using the Python language.
Motor Controls Made Easy
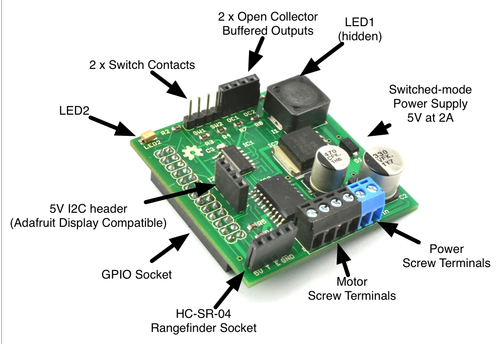
The RRB easily fits on top of the Raspberry Pi’s GPIO dual pin header connector. The major onboard electronics I/O interfaces supported by the RRB is the L293D H-Bridge motor driver circuit. The L293D H-Bridge motor driver circuit can easily operate two 3-6 VDC DC motors or a 5 V stepper motor.
The IC can source up to 600 mA of current per channel, allowing it to operate two 3-6 VDC motors or one stepper motor. The DC motors can be controlled together or independently using the Python RRB library Monk developed. In addition, motor speed control is accomplished using the RRB library, as well. Below are two RRB Python example instructions for controlling the speed of two DC motors.
from rrb2 import*
rr=RRB2()
rr.forward() ; controlling one dc motor at ½ speed
rr.set_motors(1, 0, 1, 0) ;set both motors forward at full speed.
The expansion board can supply a maximum of 2 A of operating current for the Raspberry Pi, making it convenient for operating both the Linux-based computer and expansion board from six AA batteries (9 VDC).
Additional RRB Interfaces
Also, the RRB has an I2C (inter-integrated circuit) female header connector, allowing other I2C compliant devices to be operated by the expansion board. I discussed in my webcast how an 8-by-8 Bicolor LED matrix with an Adafruit backpack can be attached to the I2C connector.
The onboard LEDs can also be operated using the Python language, along with two open collector output pins for controlling devices like electromechanical relays or solenoids with an external power supply. Two switch contact pins allow digital switches or sensors to be attached to your robot or mini motion controller application. Last, if non-contact objection detection is a requirement for your robot, the RRB has an ultrasonic range finder header connector for attaching a Parallax or compatible ping sensor to the expansion board. Again, these peripheral devices can be programmed using Python.
Building Visual Displays
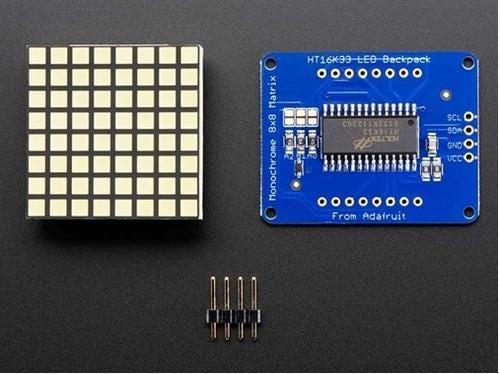
Besides controlling robotic devices, the RRB can be used in creating interactive visual displays as well. The onboard I2C serial header connector allows various LED matrices to be attached easily to the RRB.
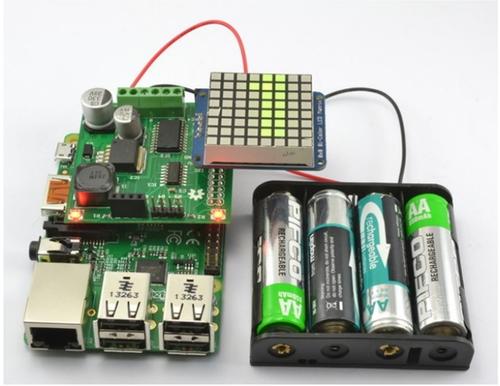
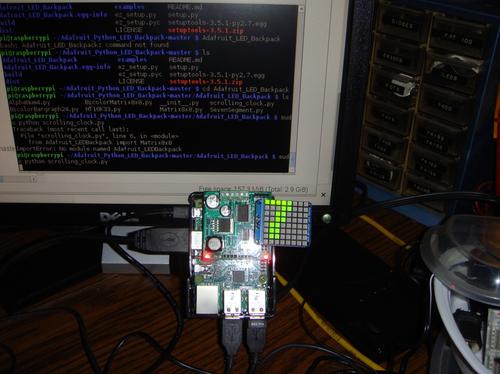
The LED Backpack provides a two-wire attachment to the RRB, thus minimizing the amount of connected wires to the matrix display. One awesome project you can build with an 8-by-8 LED matrix – LED Backpack is a scrolling clock. This time piece illustrates the versatility of the RRB for creating visual displays with the RRB. Complete details for this project along with mini RRB labs can be obtained from the Design News Continuing Education Center webcast archives library.
Don Wilcher is a passionate teacher of electronics technology and an electrical engineer with 26 years of industrial experience. He’s worked on industrial robotics systems, automotive electronic modules/systems, and embedded wireless controls for small consumer appliances. He’s also a book author, writing DIY project books on electronics and robotics technologies. His latest book, Make: Basic Arduino Projects, published by Maker Media, is on the Alabama State Department’s approved Career and Technical Education (CTE) reading list. He’s currently developing 21st century educational training products and curriculum focusing on Internet of Things (IoT) and Industrial Physical Computing for makers, engineers, technicians, and educators. Besides being an Electrical Engineer, he’s a Certified Electronics Technician with ETA International and Alabama State Certified Electronics Instructor.
About the Author(s)
You May Also Like


.jpg?width=300&auto=webp&quality=80&disable=upscale)
